Feishu
Four steps to connect Feishu: create an app, connect in BotDrop, set up event subscription, then get your User ID.
Step 1: Create App on Feishu Open Platform
Section titled “Step 1: Create App on Feishu Open Platform”Open the Developer Console
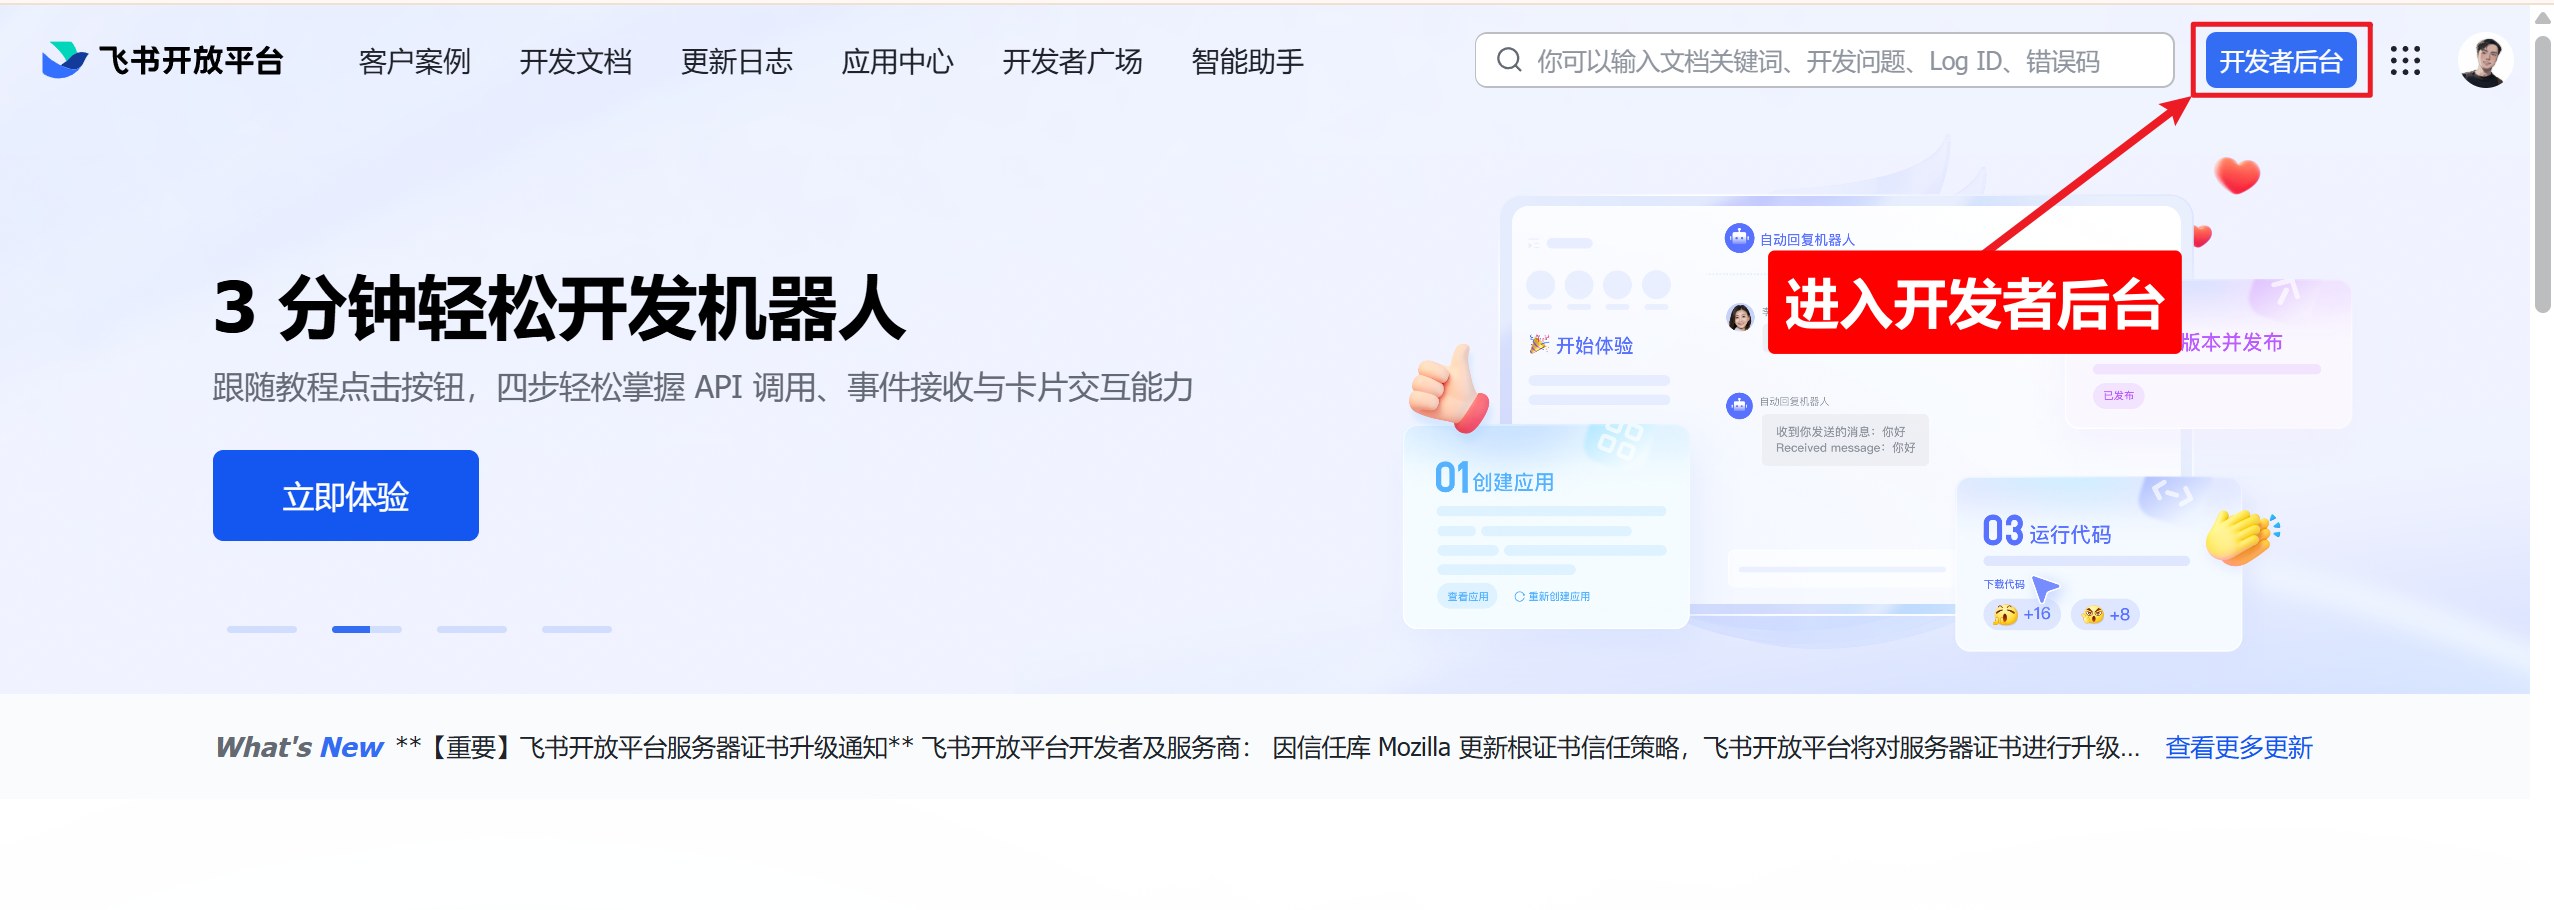
Section titled “Open the Developer Console”Go to Feishu Open Platform and click “Developer Console” in the top right.
Create a Custom App
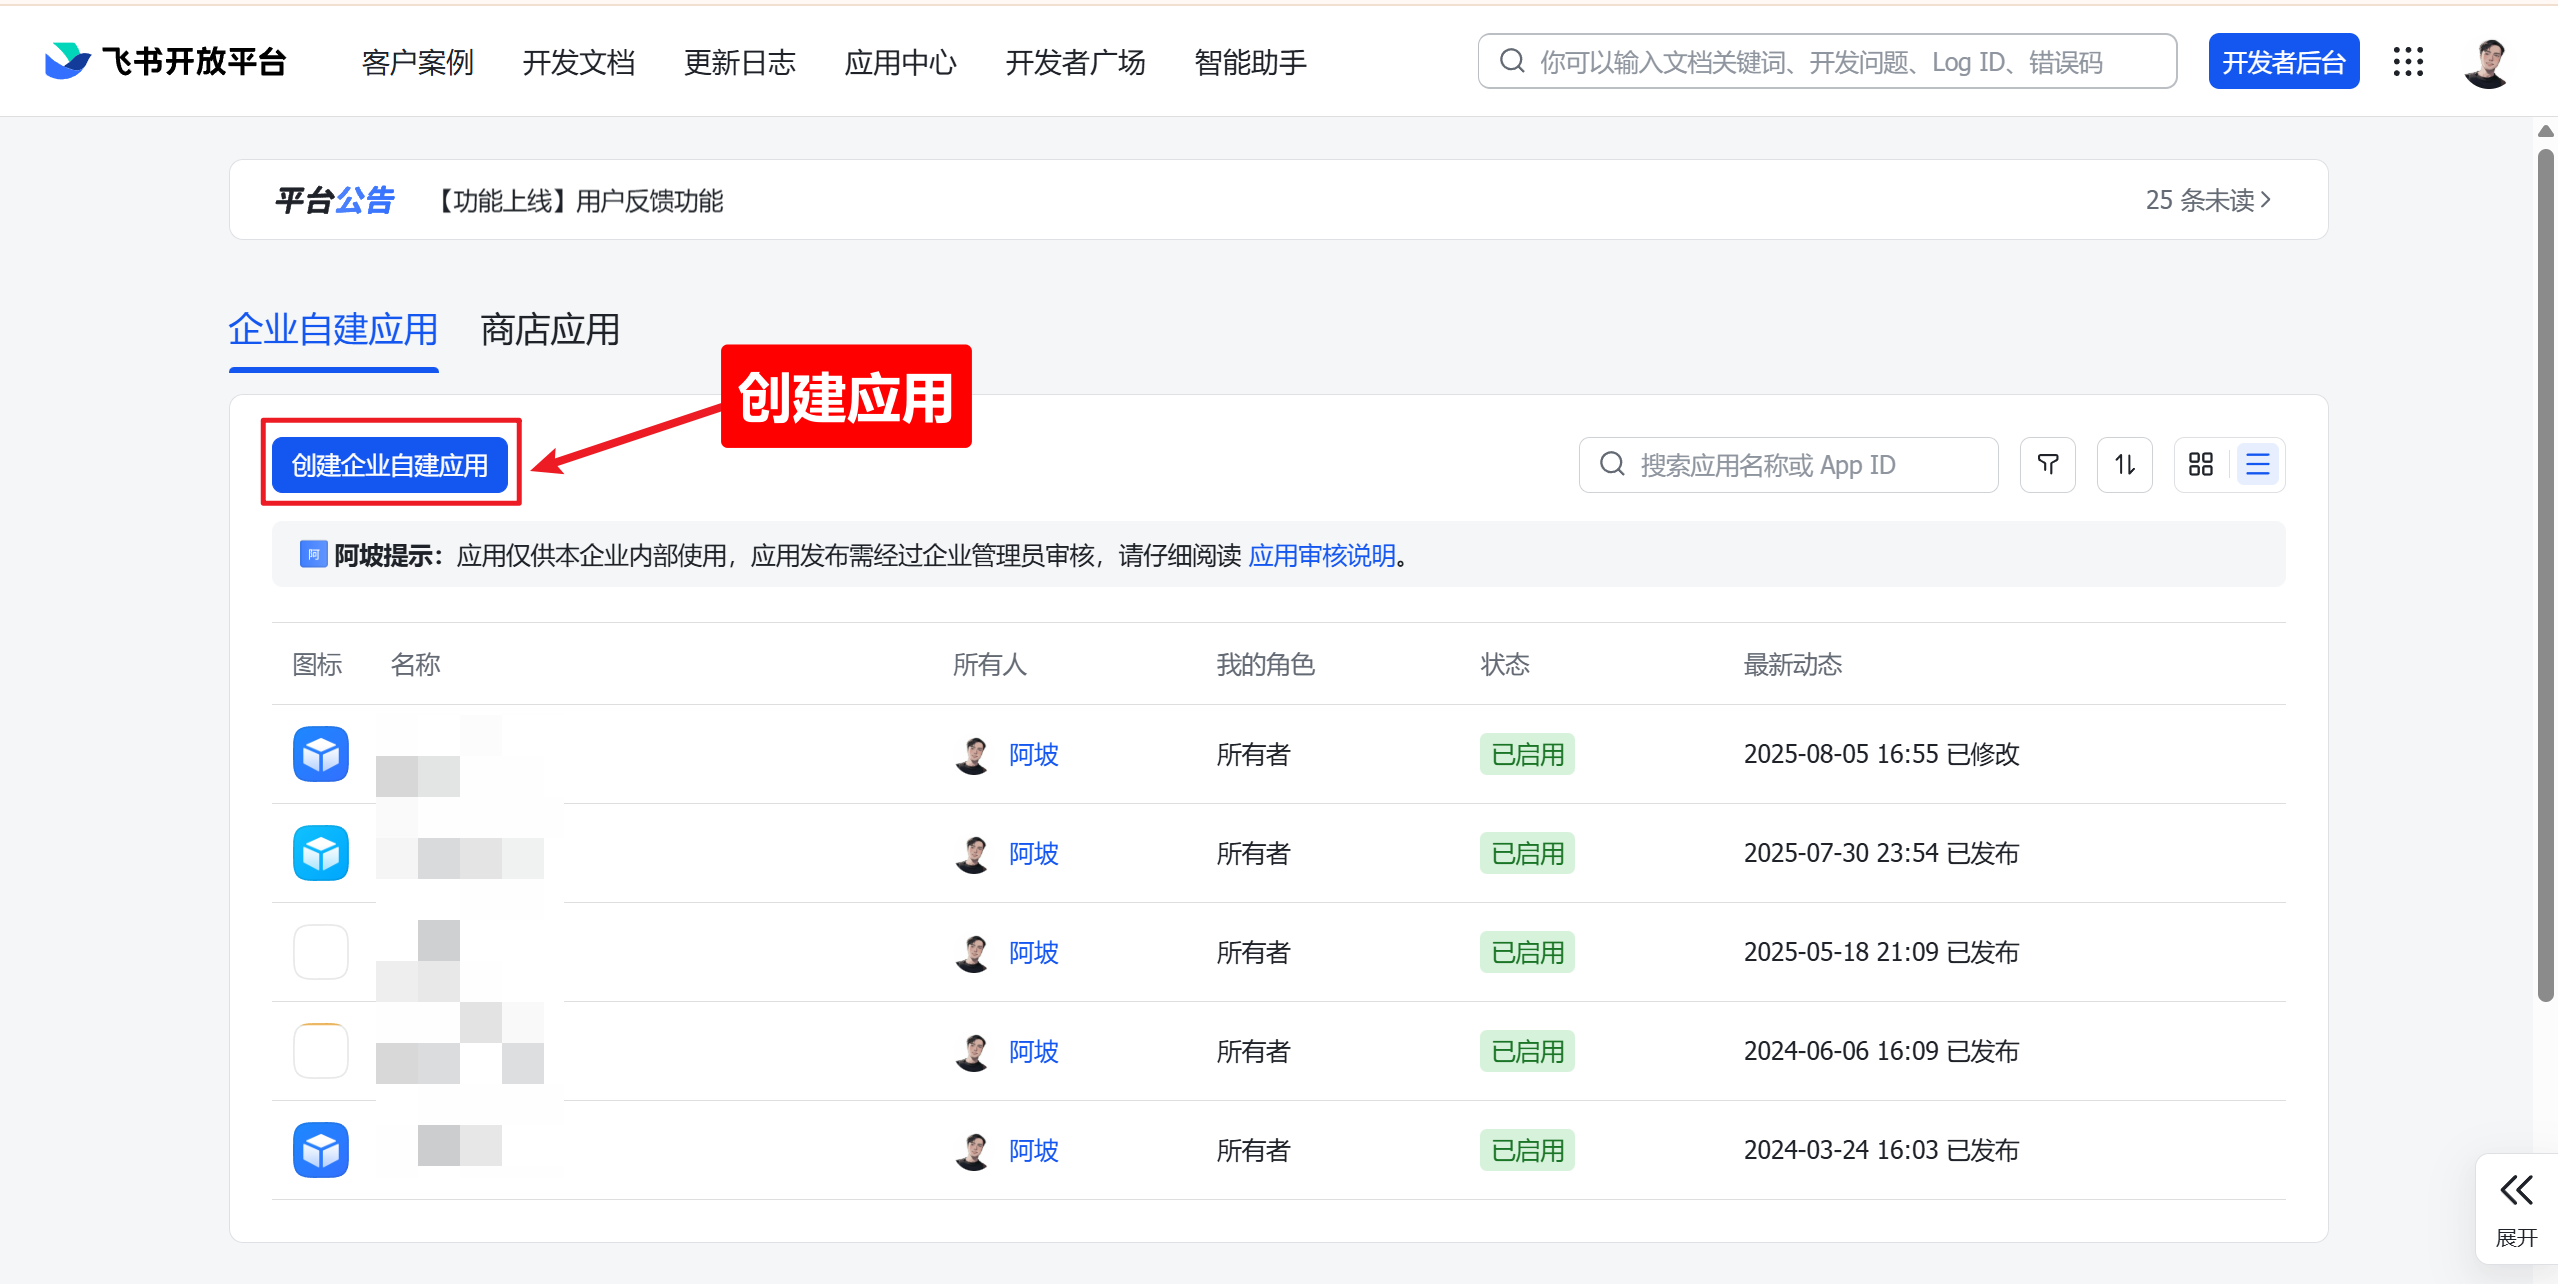
Section titled “Create a Custom App”Click “Create Custom App”.
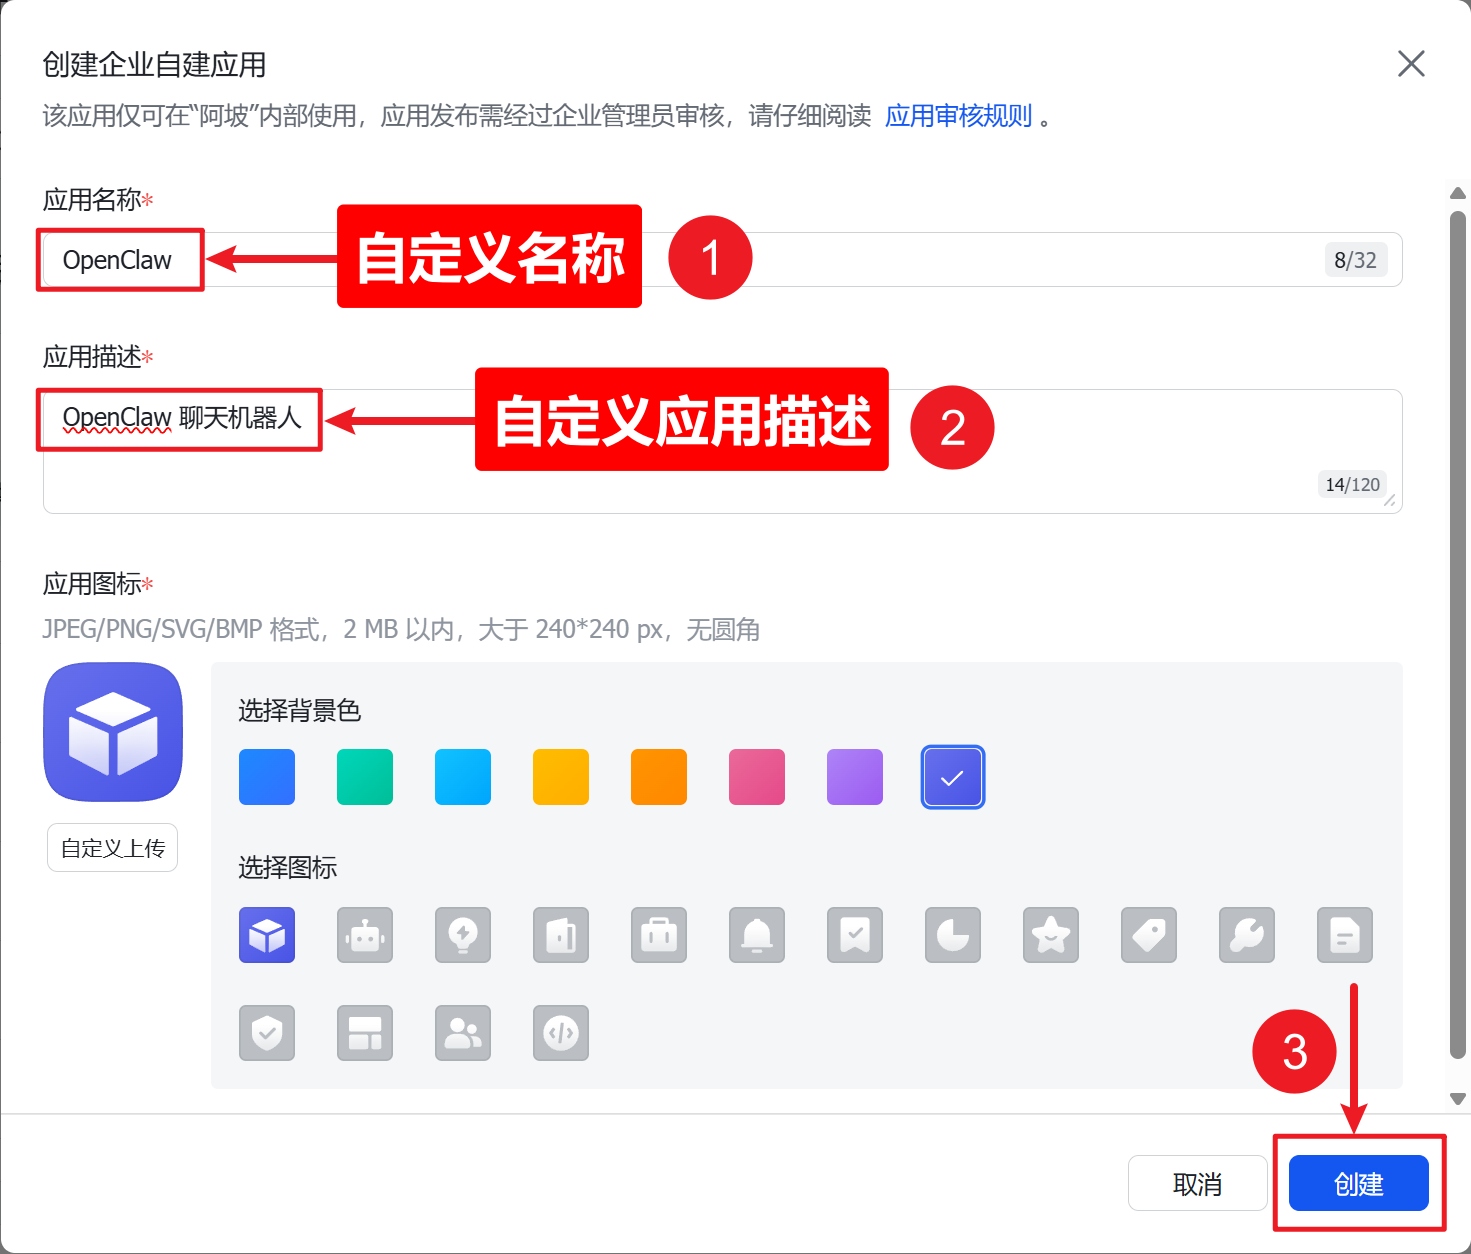
Fill in the app name (e.g. “BotDrop”), description, and pick an icon.
Note Your App ID and App Secret
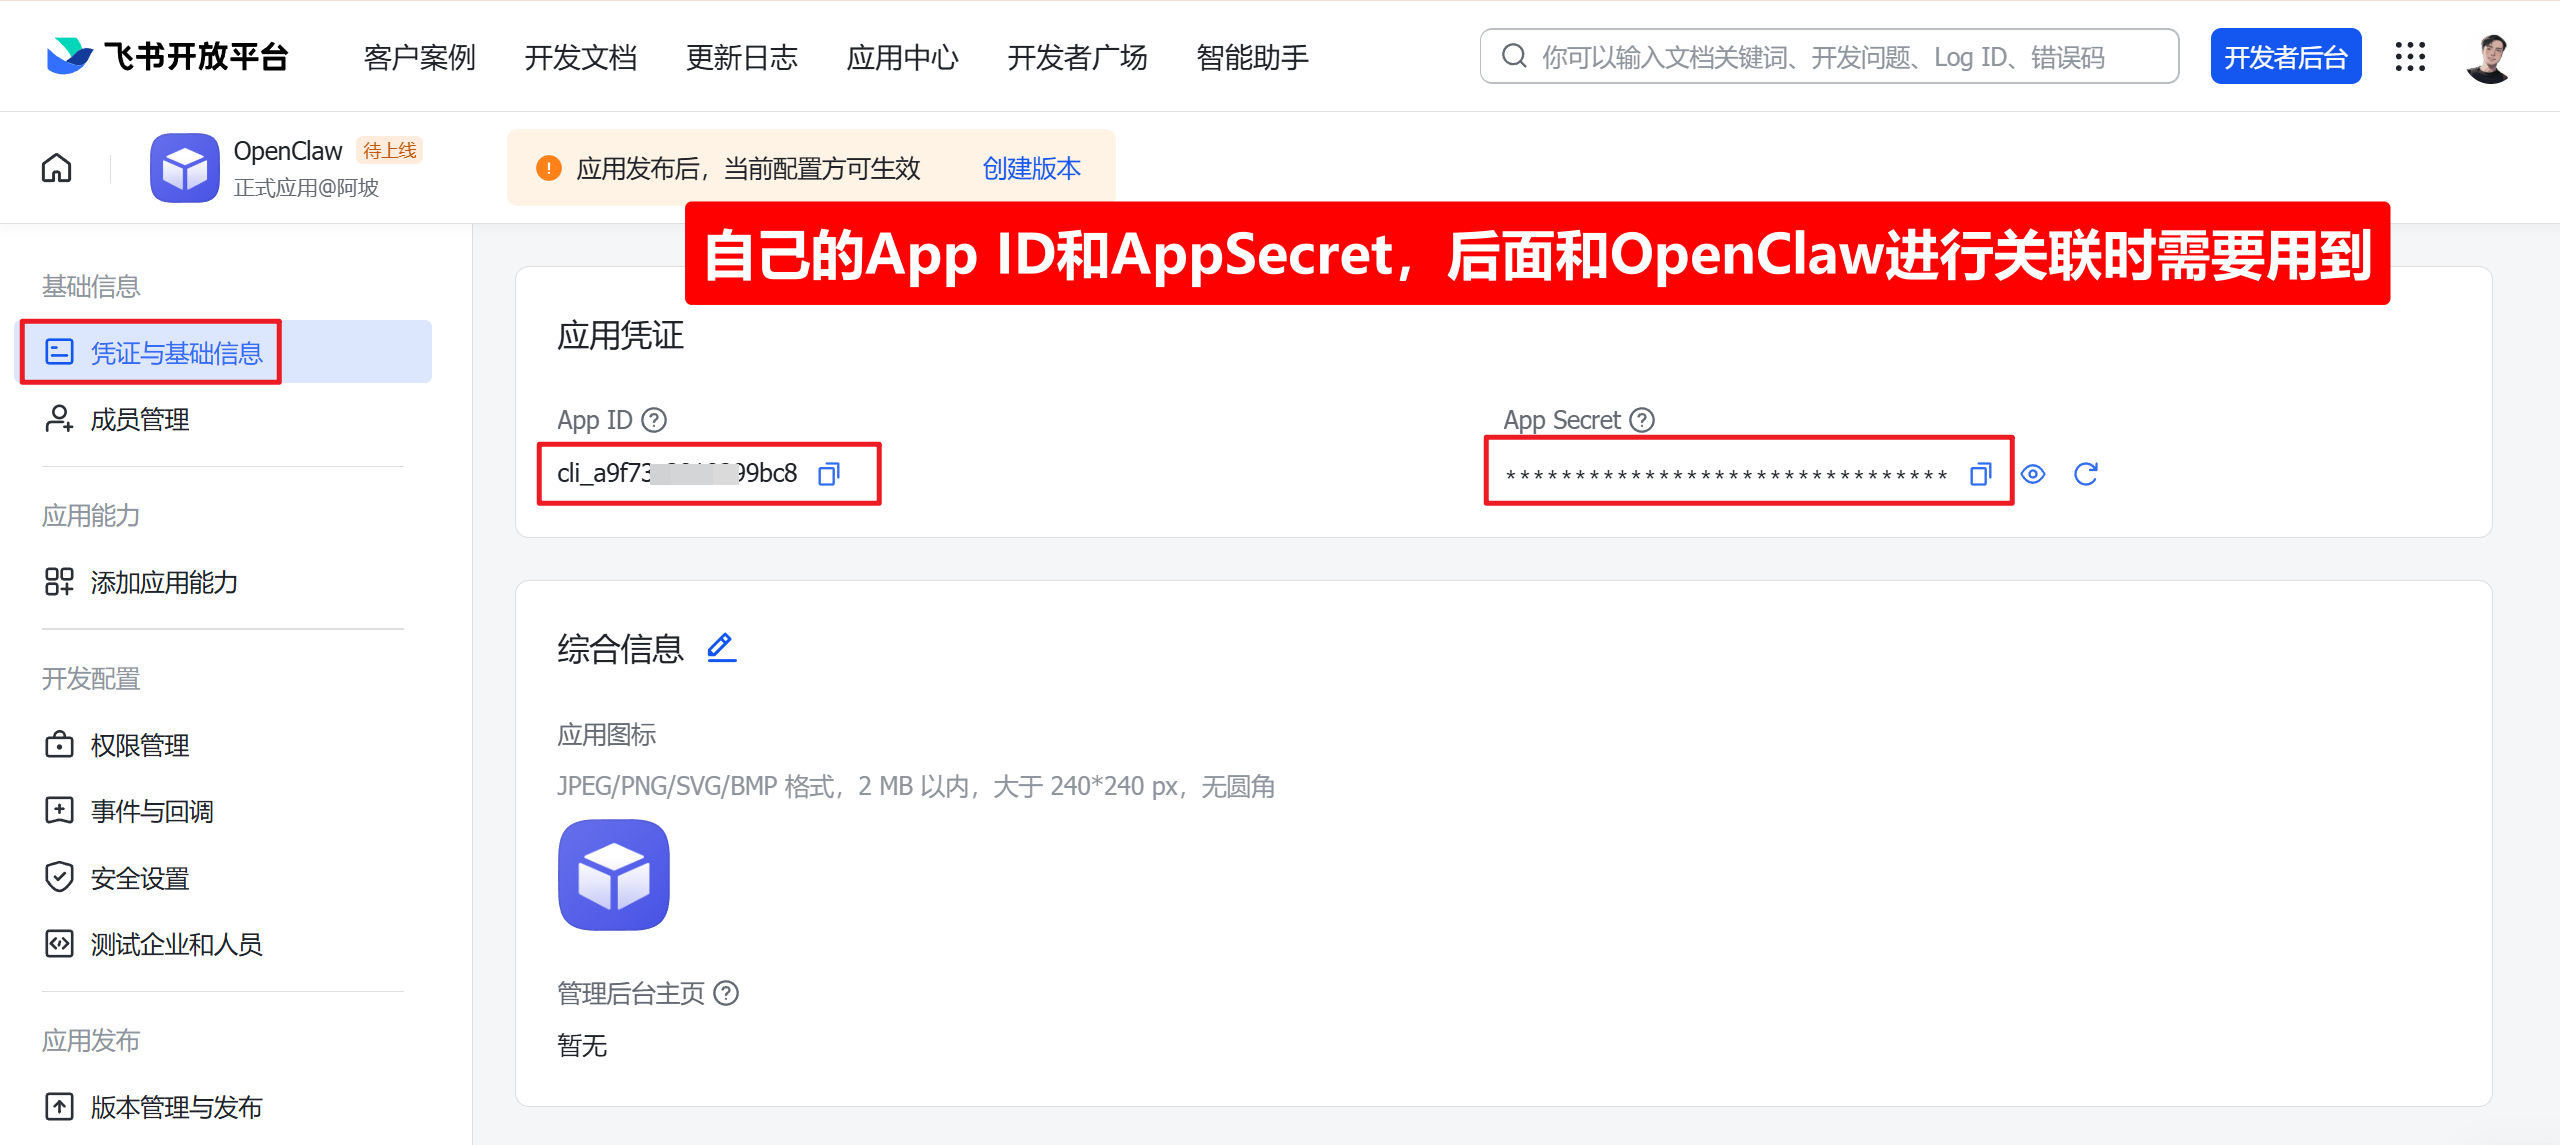
Section titled “Note Your App ID and App Secret”After creation, go to “Credentials & Basic Info”. Copy the App ID and App Secret.
Add Bot Capability
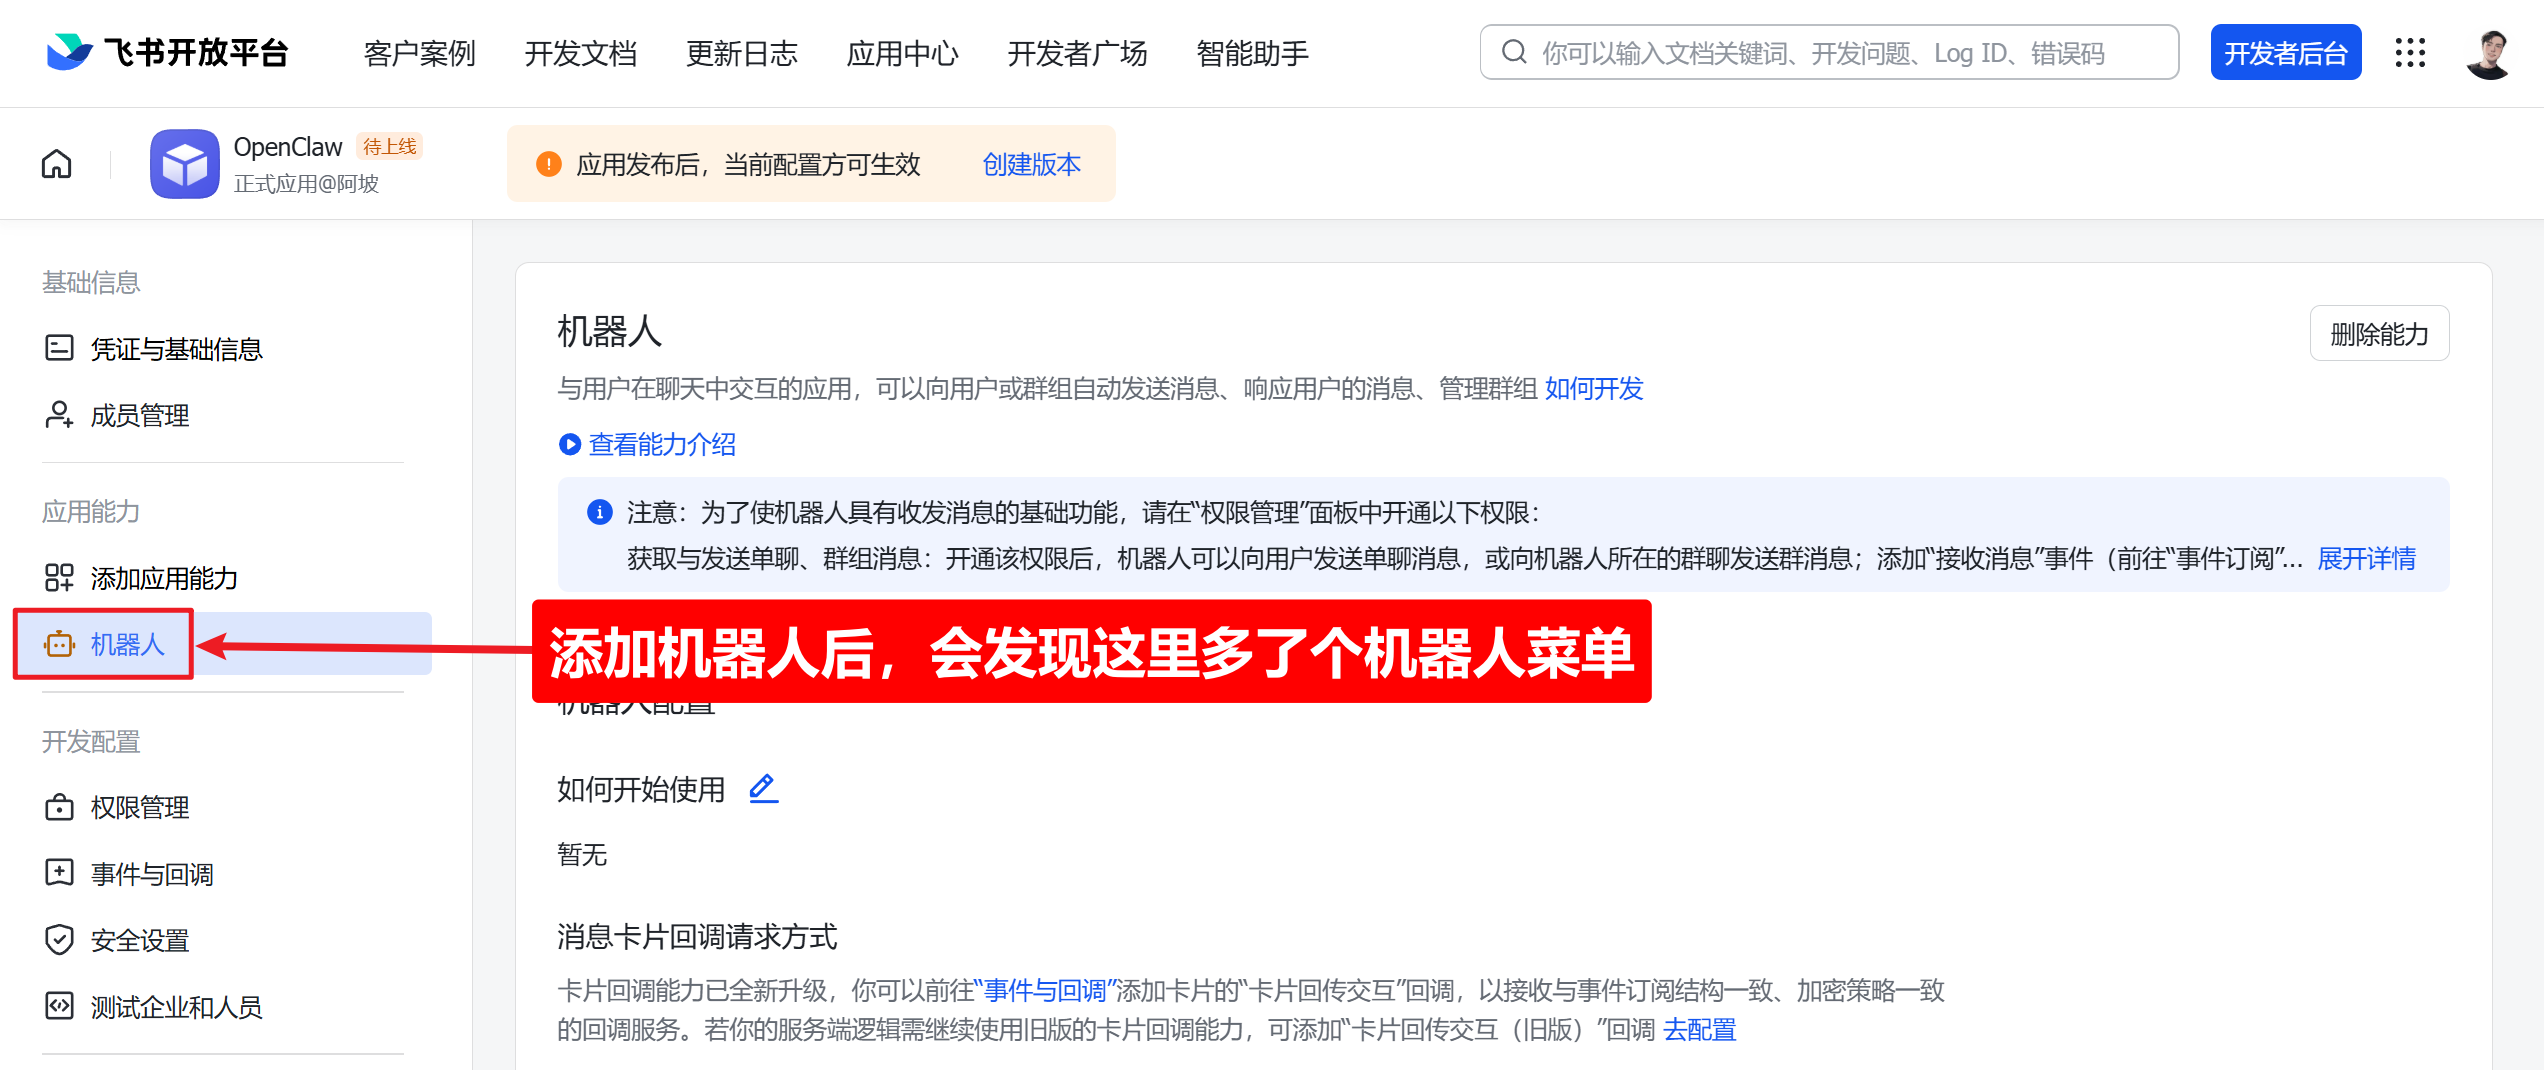
Section titled “Add Bot Capability”Go to “Add App Capability” and click “Add” under “Bot”.
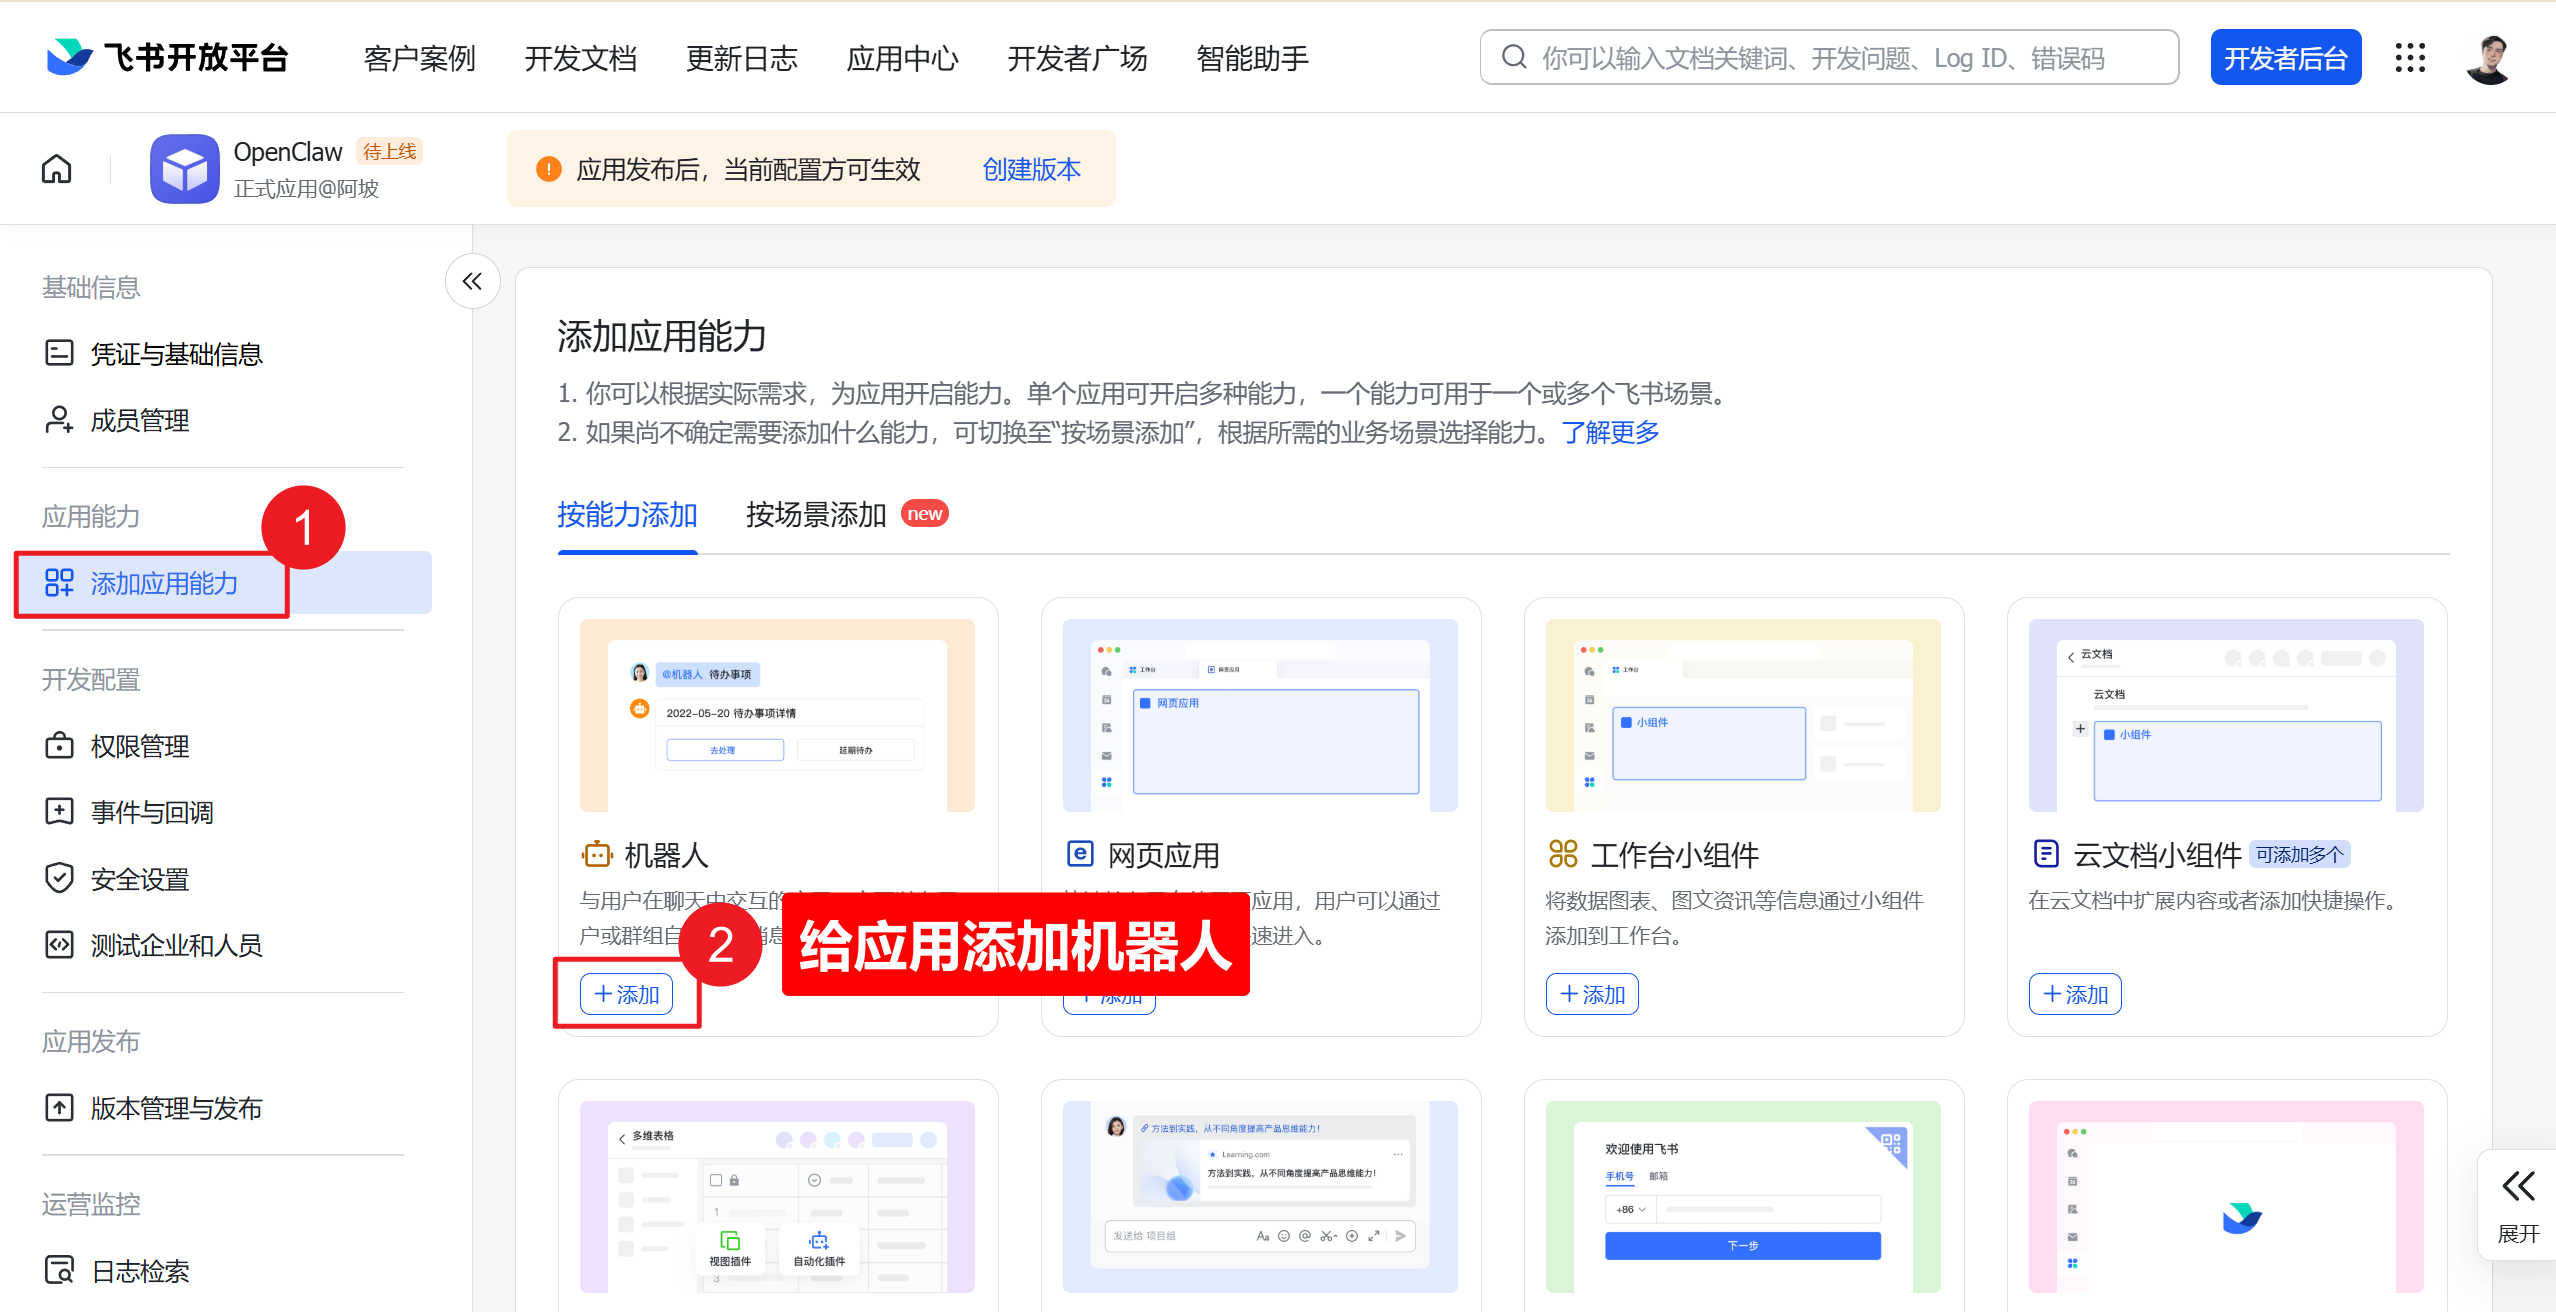
Once added, “Bot” appears in the left sidebar.
Configure Permissions
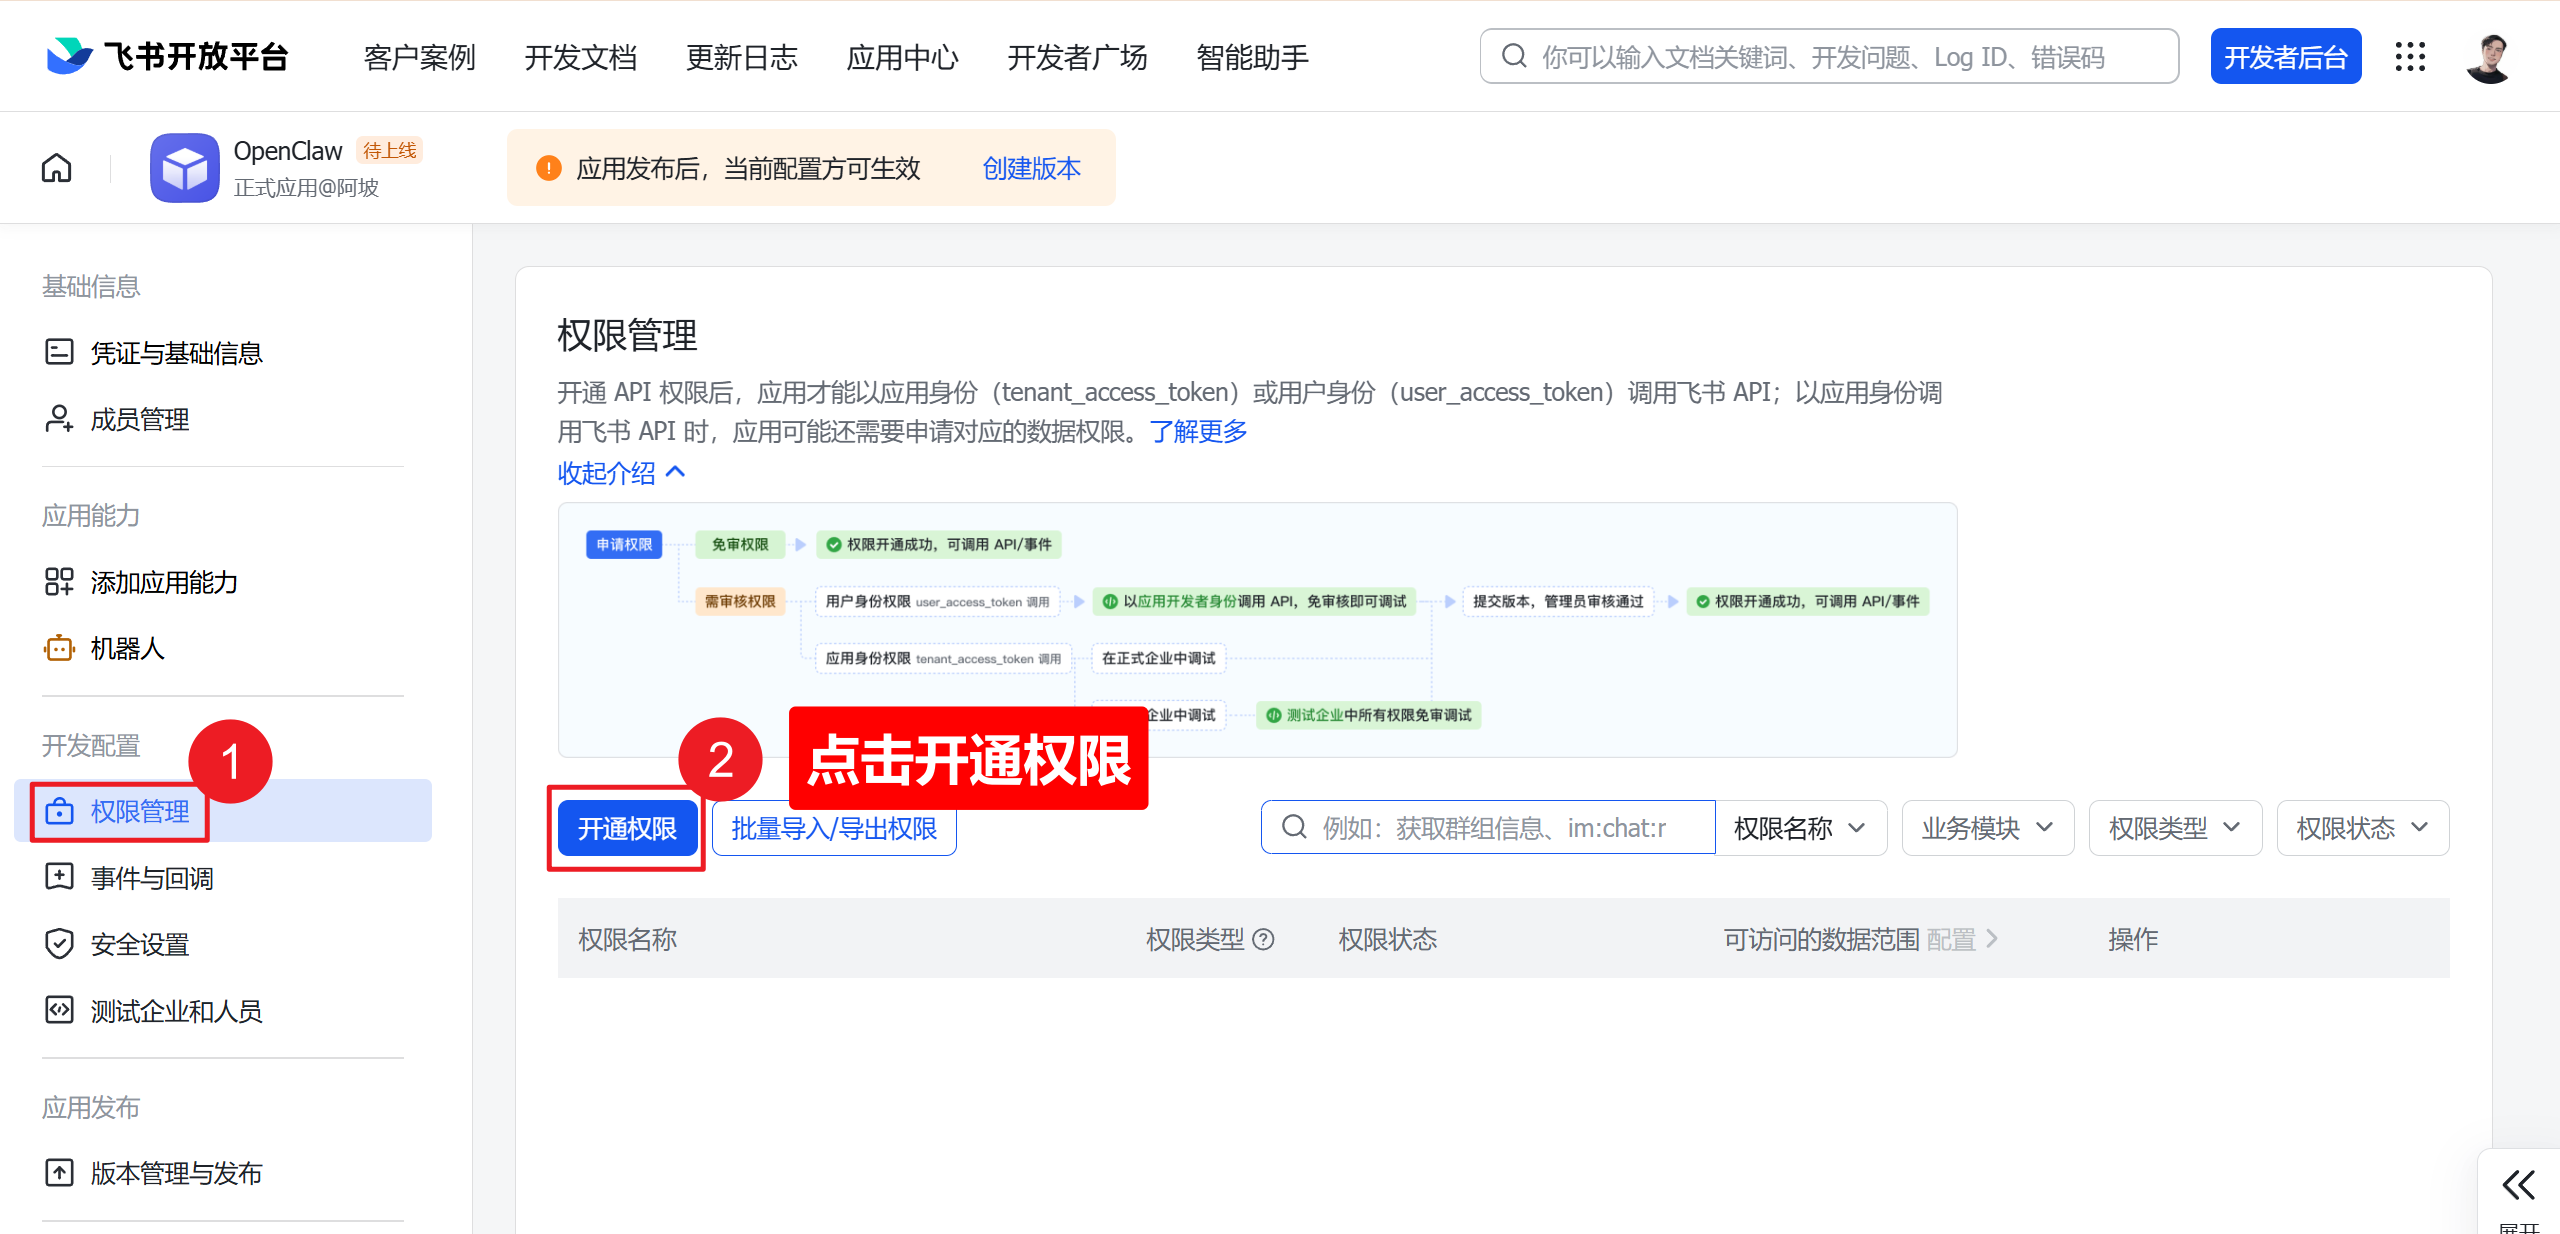
Section titled “Configure Permissions”Go to “Permissions Management” and click “Add Permissions”.
Search for im: and enable all IM-related permissions.
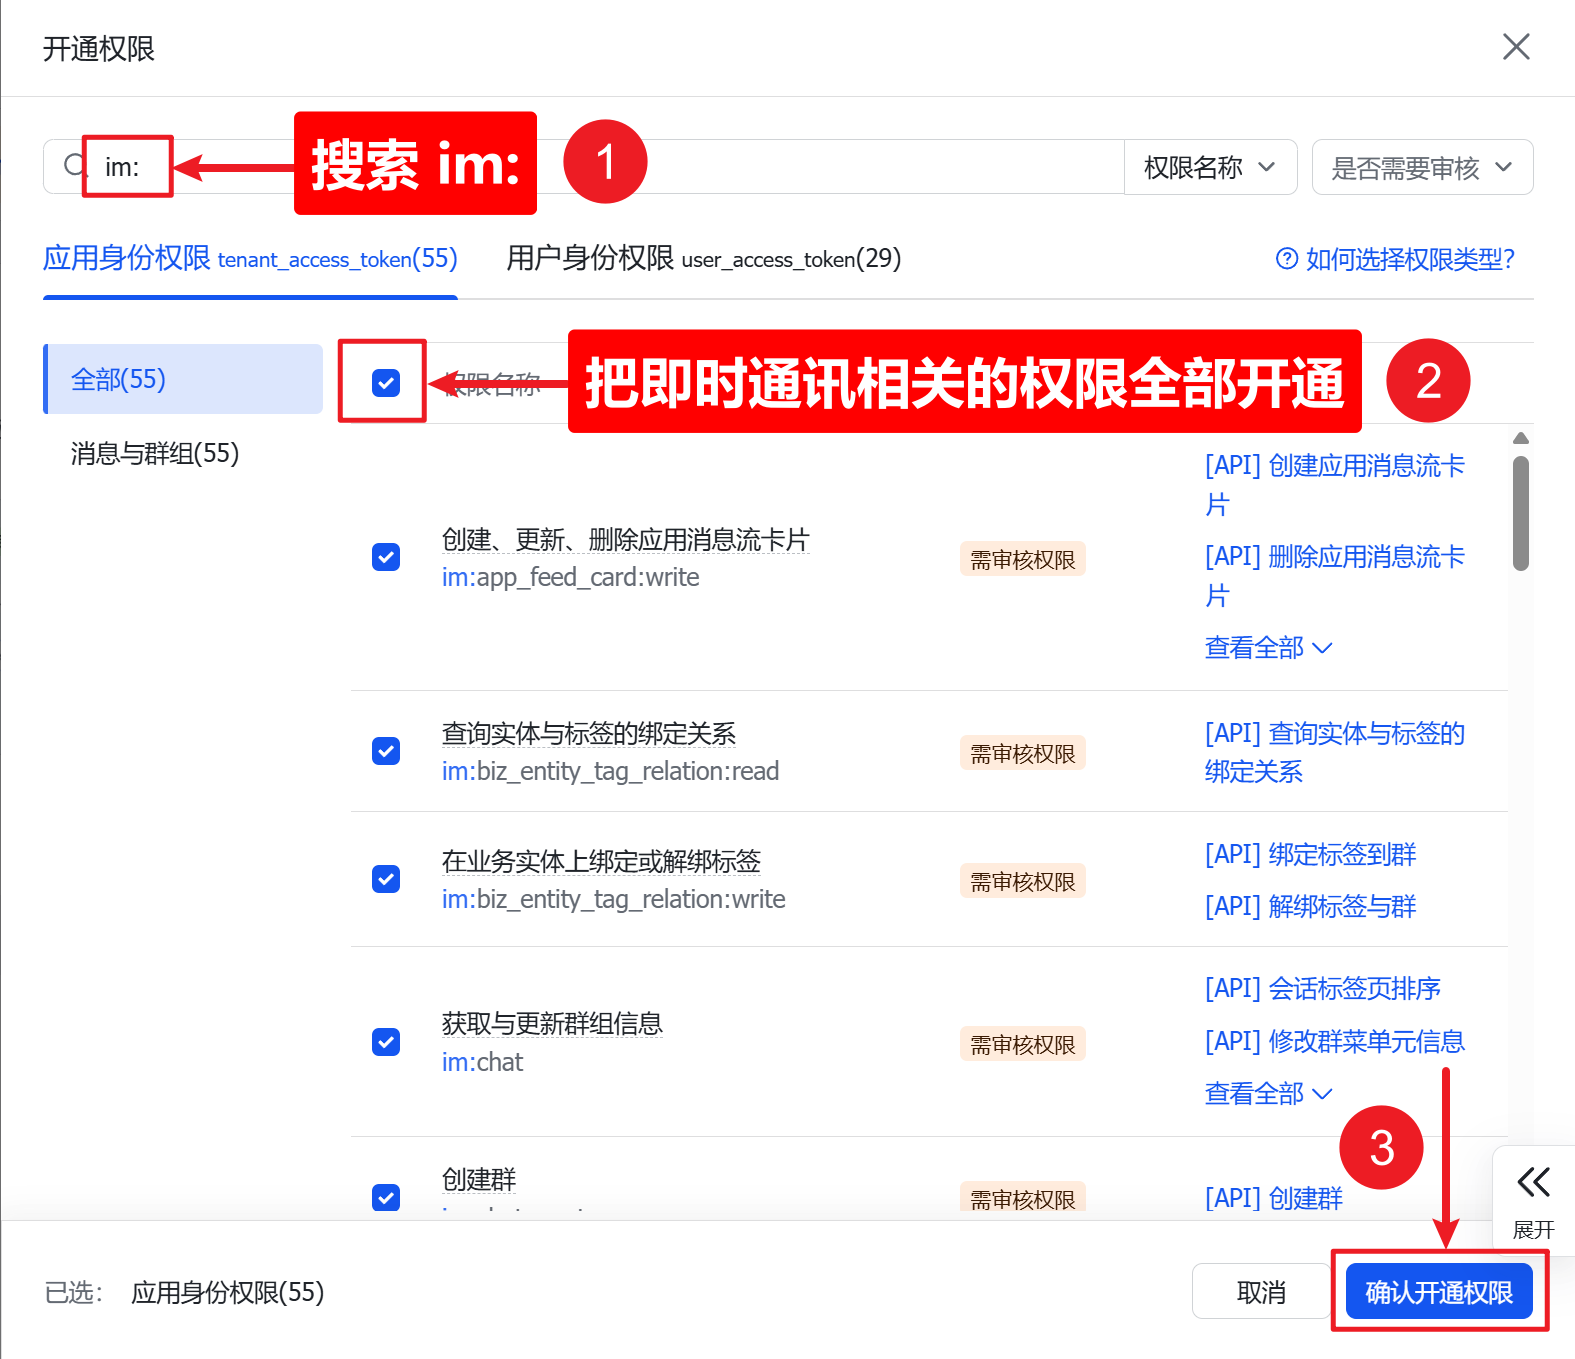
Required permissions:
| Permission | Description |
|---|---|
contact:user.base:readonly | Read basic user info |
im:message | Send and receive messages |
im:message.p2p_msg:readonly | Read direct messages |
im:message.group_at_msg:readonly | Receive group @ messages |
im:message:send_as_bot | Send messages as bot |
im:resource | Upload/download images and files |
Optional (recommended):
| Permission | Description |
|---|---|
im:message.group_msg | Read all group messages |
im:message:readonly | Access message history |
im:message:update | Edit sent messages |
im:message:recall | Recall messages |
Save permissions.
📋 Reference configuration (click to expand)
{ "scopes": { "tenant": [ "aily:file:read", "aily:file:write", "application:application.app_message_stats.overview:readonly", "application:bot.menu:write", "application:application:self_manage", "base:app:copy", "base:app:create", "base:app:read", "base:app:update", "base:collaborator:create", "base:collaborator:delete", "base:collaborator:read", "base:dashboard:copy", "base:dashboard:read", "base:field:create", "base:field:delete", "base:field:read", "base:field:update", "base:form:read", "base:form:update", "base:record:create", "base:record:delete", "base:record:read", "base:record:retrieve", "base:record:update", "base:role:create", "base:role:delete", "base:role:read", "base:role:update", "base:table:create", "base:table:delete", "base:table:read", "base:table:update", "base:view:read", "base:view:write_only", "base:workflow:read", "base:workflow:write", "cardkit:card:write", "contact:user.base:readonly", "contact:user.employee_id:readonly", "corehr:file:download", "docs:doc", "docs:document.content:read", "drive:drive", "event:ip_list", "im:chat", "im:chat.access_event.bot_p2p_chat:read", "im:chat.members:bot_access", "im:message", "im:message.group_at_msg:readonly", "im:message.group_msg", "im:message.p2p_msg:readonly", "im:message:readonly", "im:message:send_as_bot", "im:resource", "sheets:spreadsheet", "wiki:wiki", "wiki:wiki:readonly" ], "user": [ "aily:file:read", "aily:file:write", "contact:contact.base:readonly", "im:chat.access_event.bot_p2p_chat:read" ] }}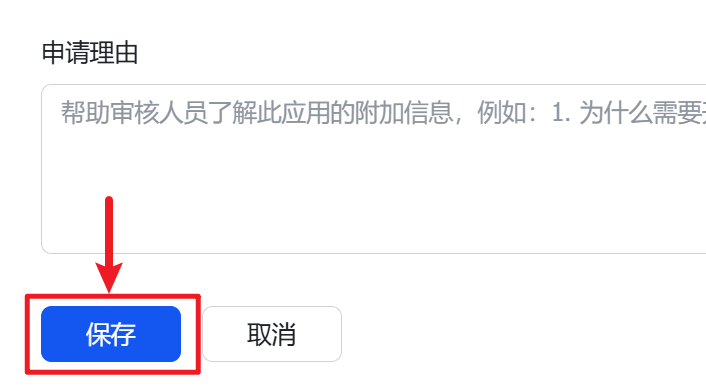
Create Version and Publish
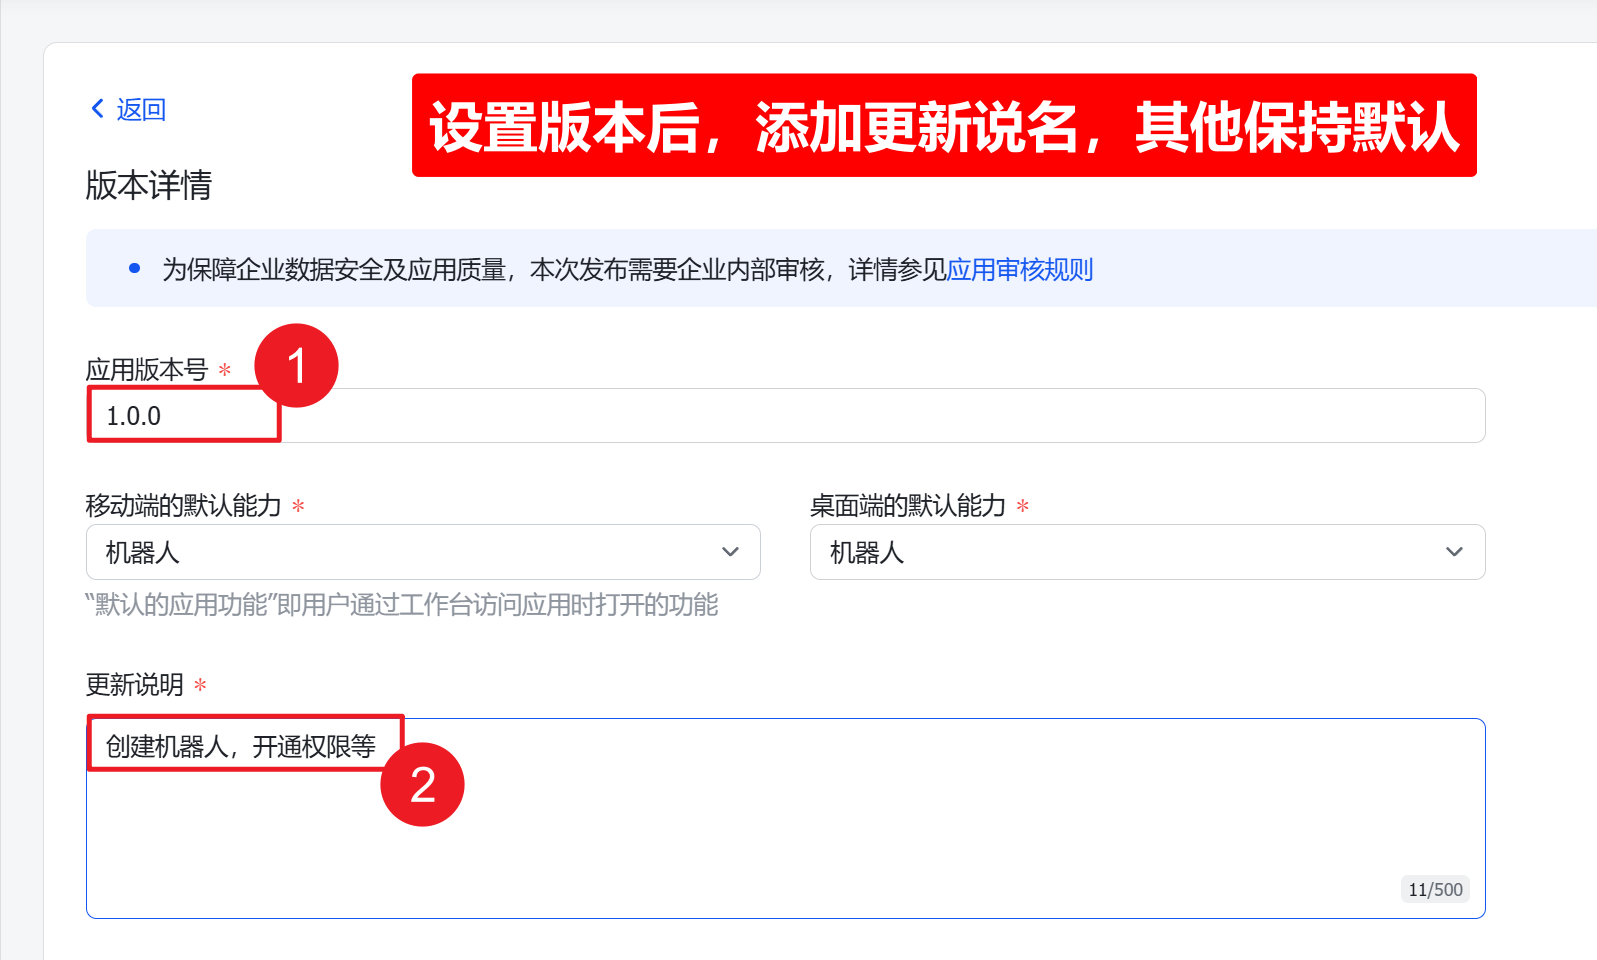
Section titled “Create Version and Publish”Click “Create Version” at the top.

Fill in version number and release notes.
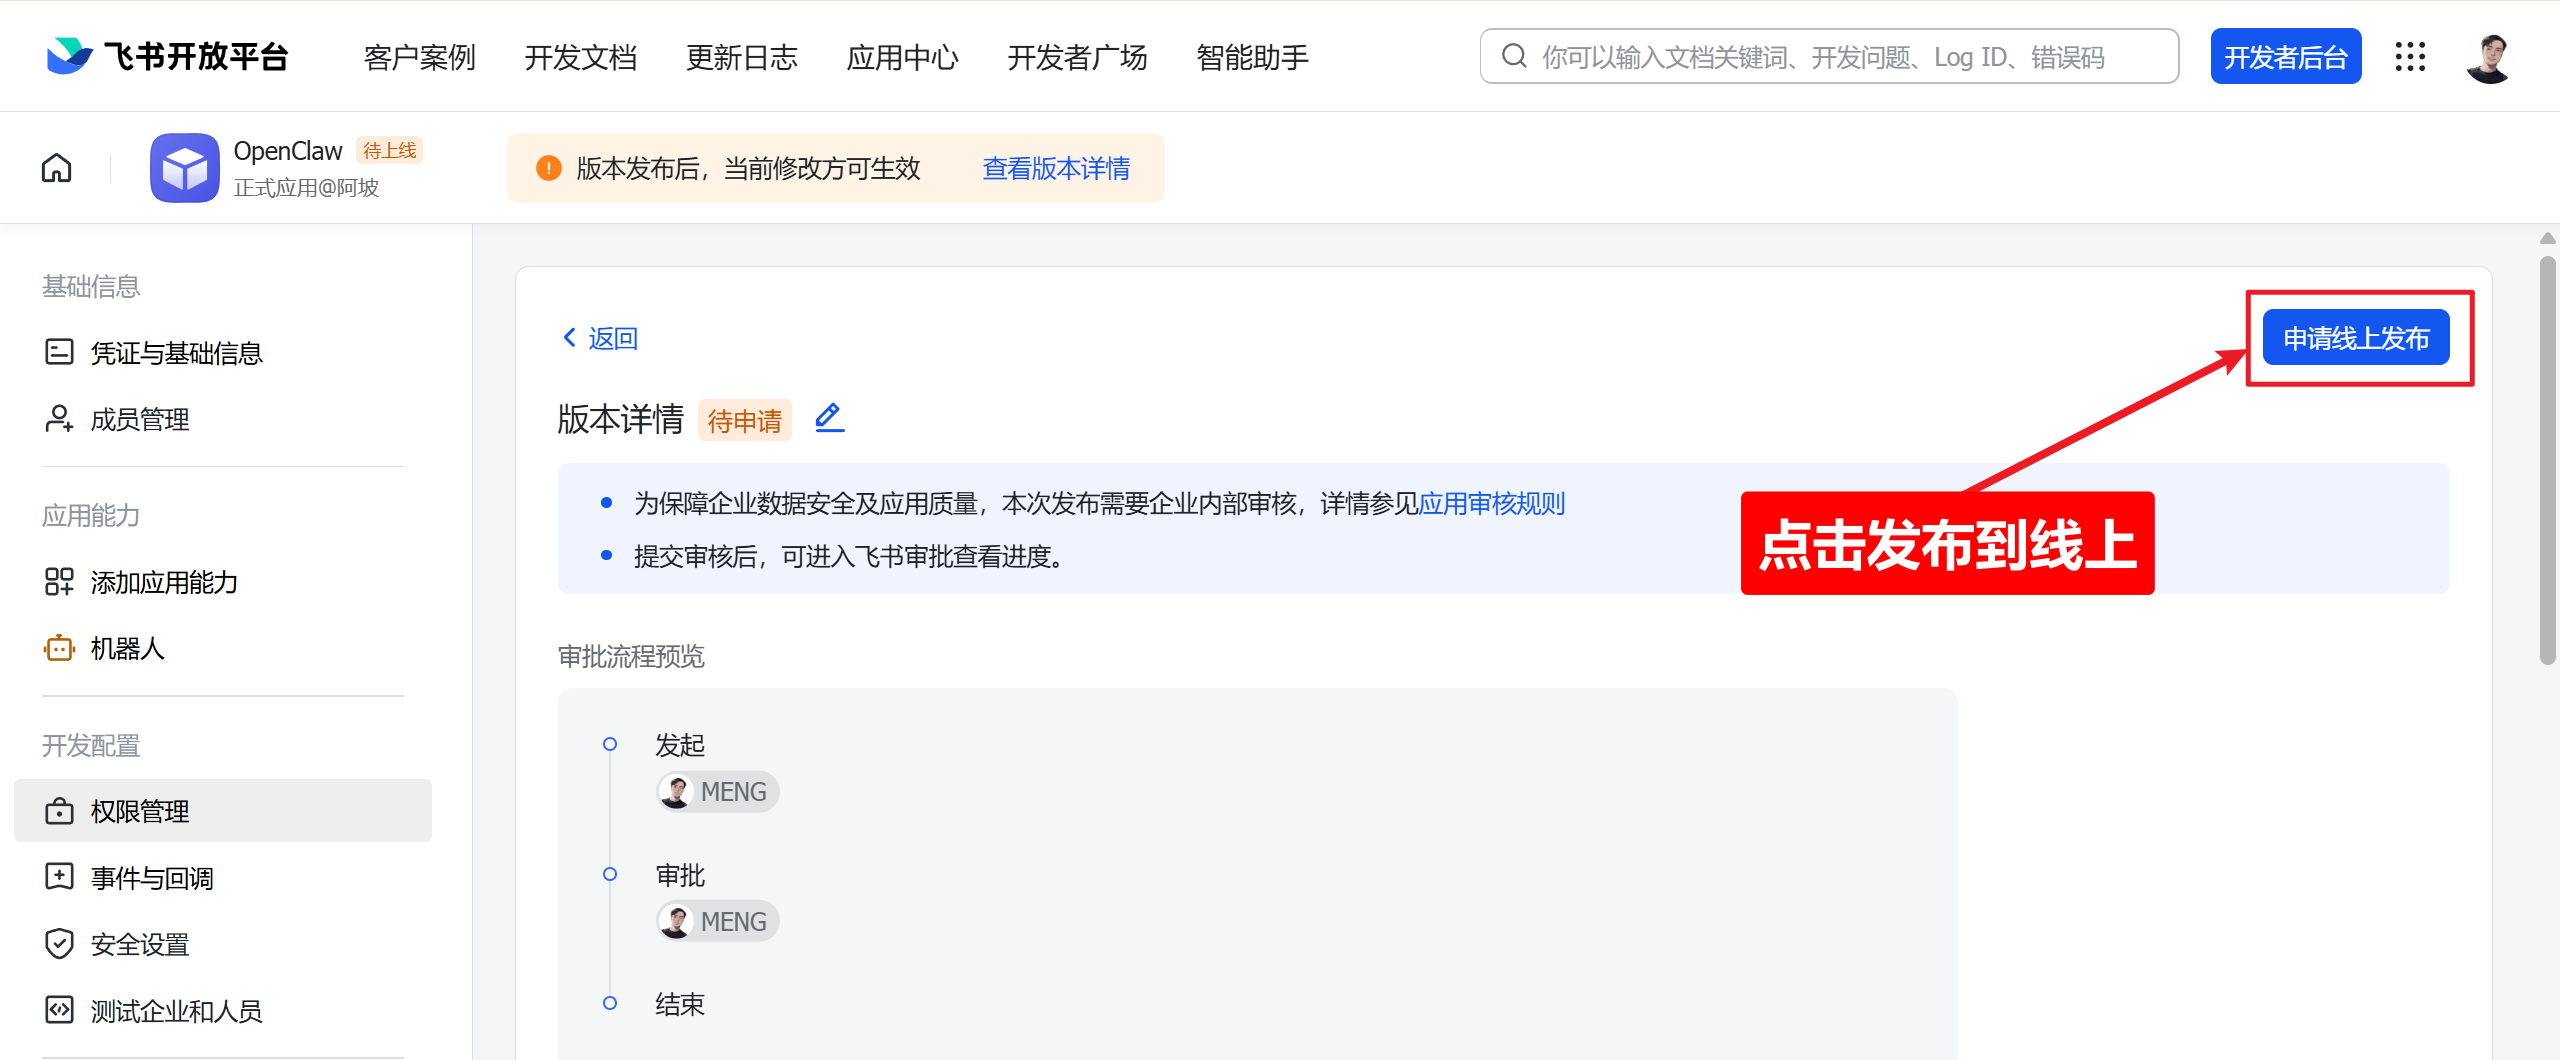
Click “Request Online Release”.
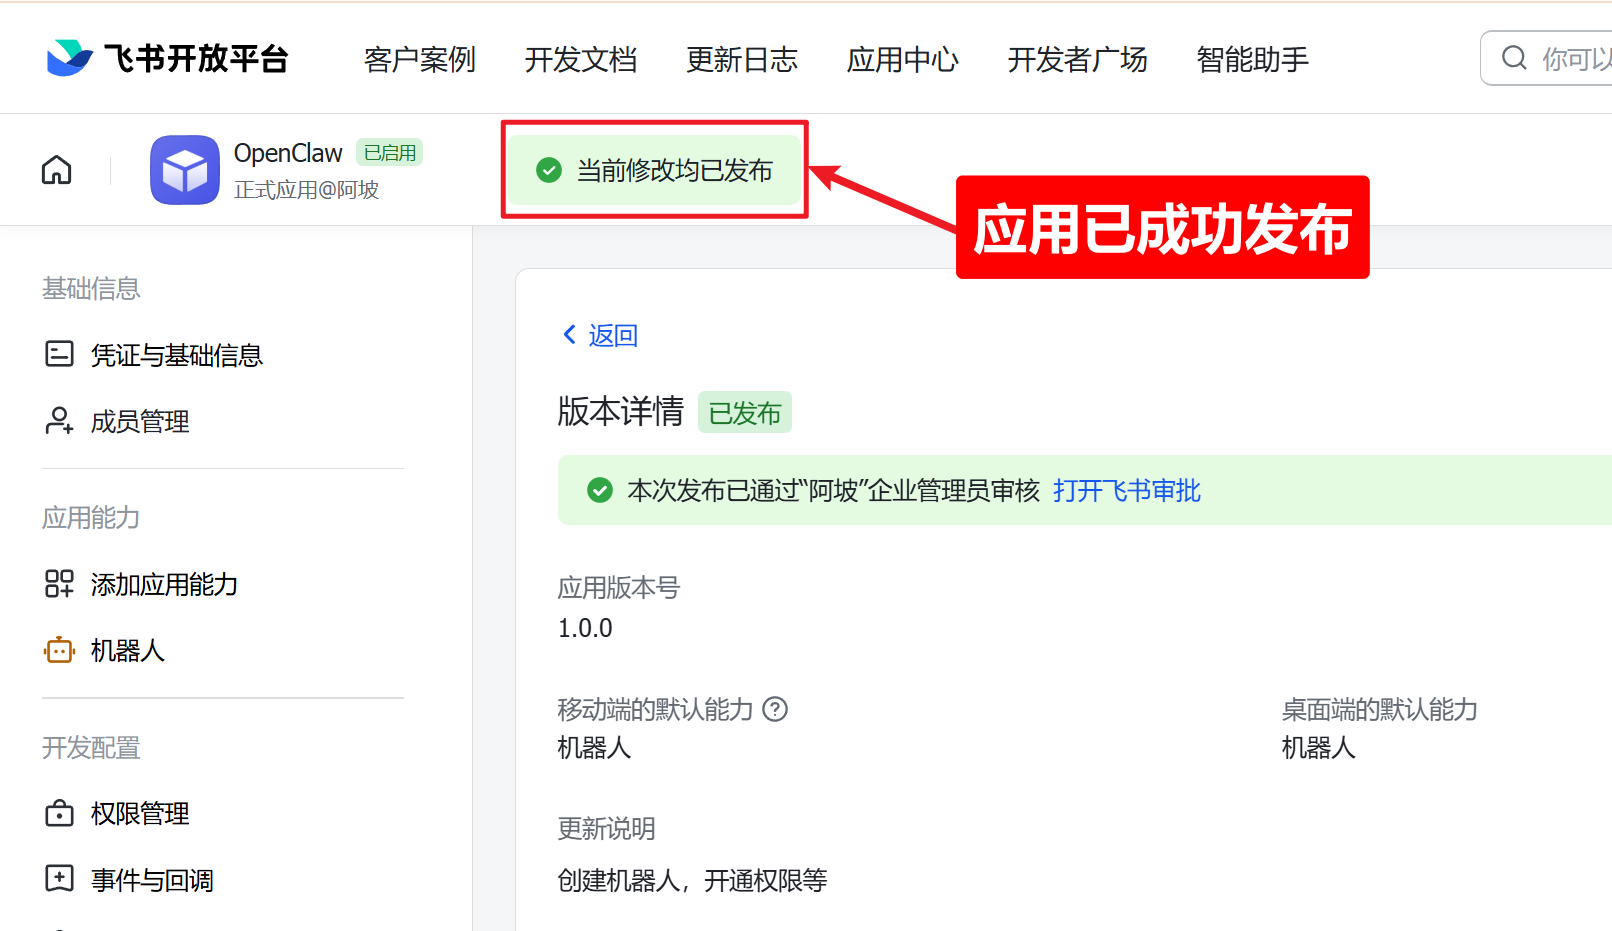
Approve in Feishu Client
Section titled “Approve in Feishu Client”Open Feishu messages, find the approval notification, and tap “Approve”.
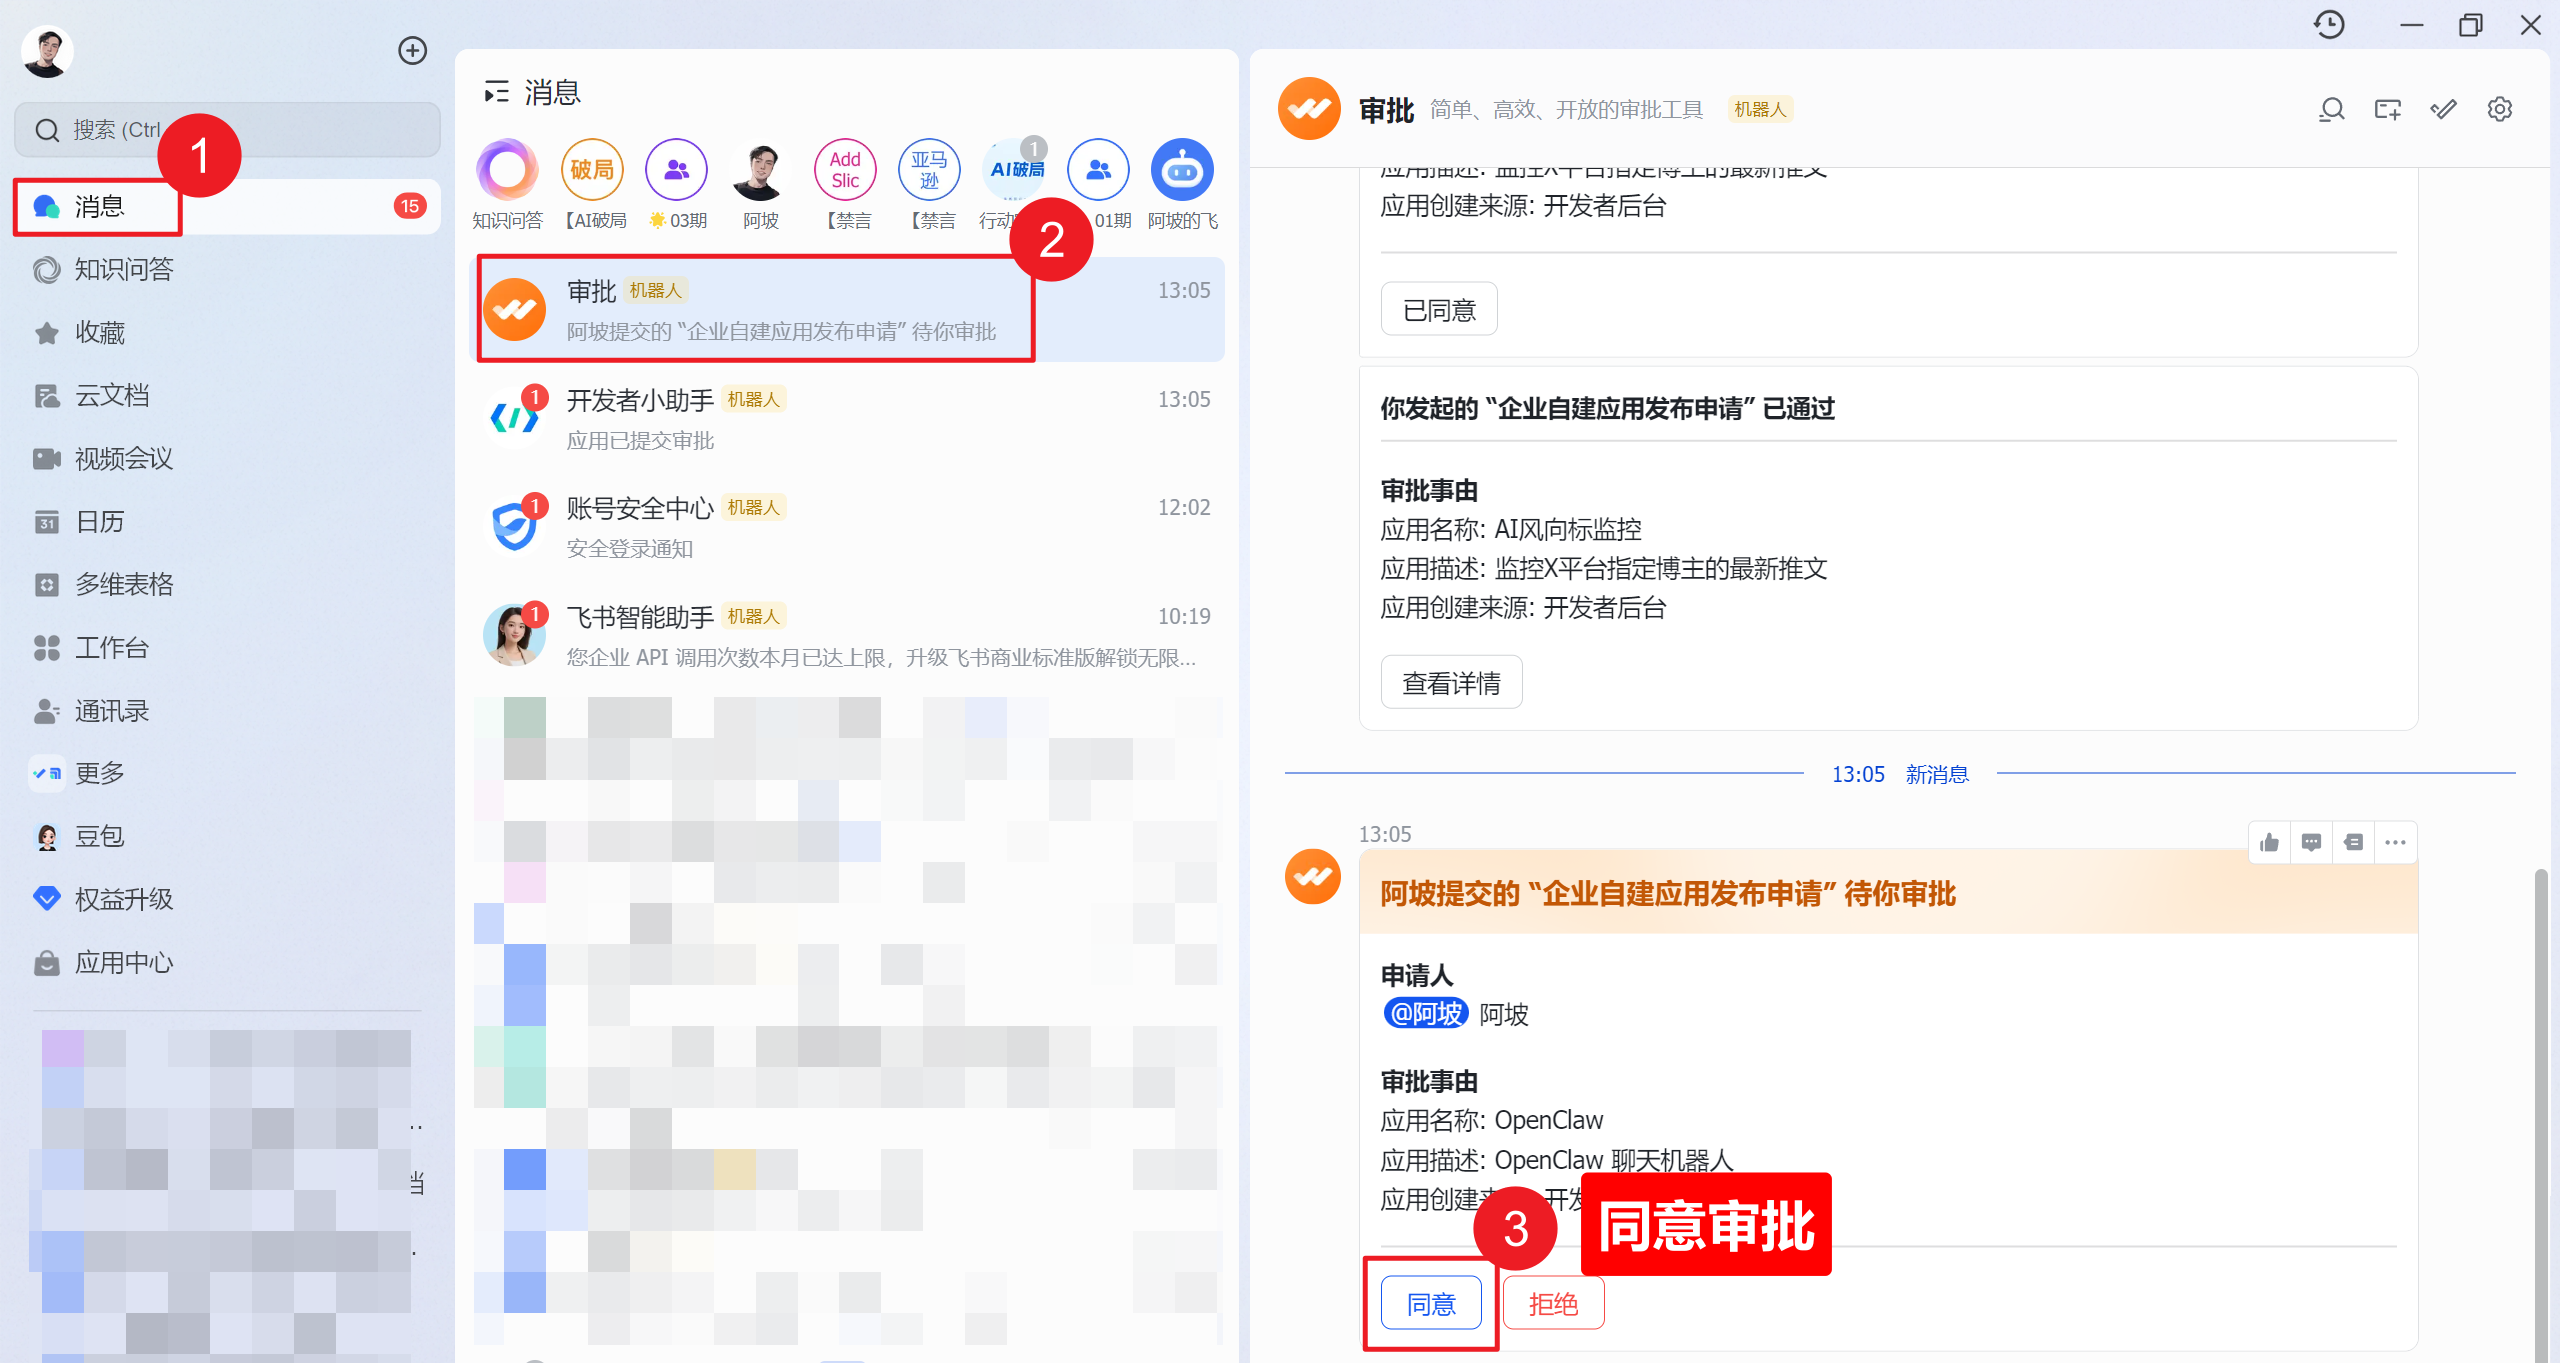
After approval, the status shows green “Published”.
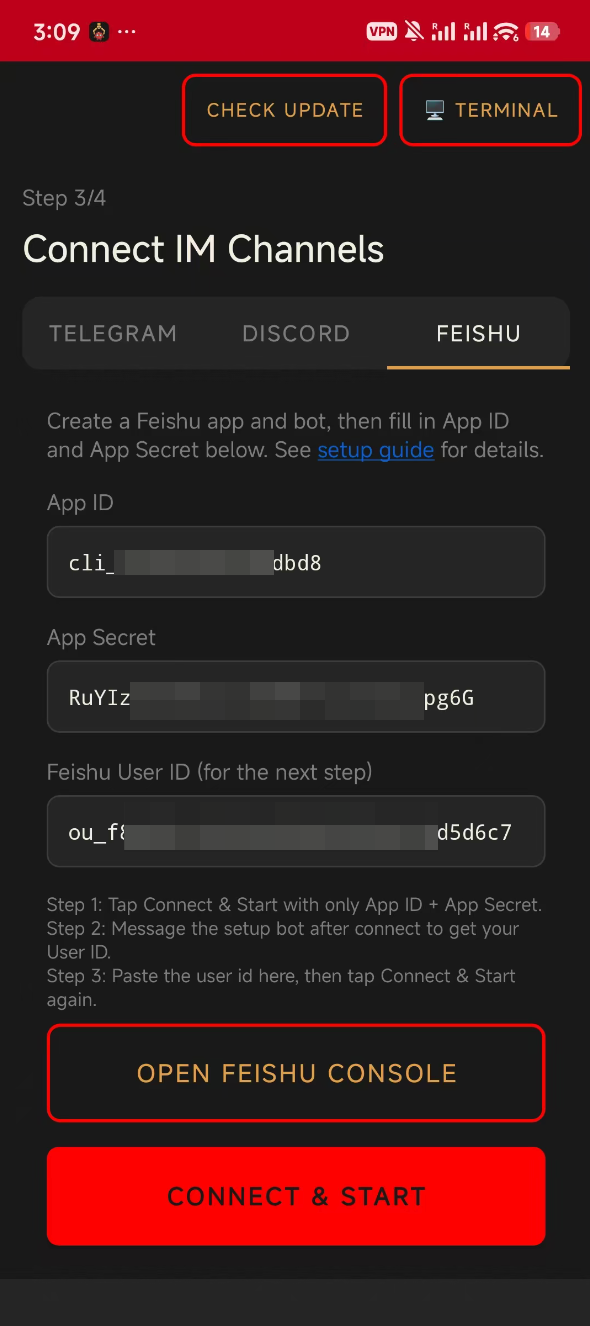
Step 2: Connect in BotDrop
Section titled “Step 2: Connect in BotDrop”In BotDrop, go to the Feishu tab under “Connect IM Channels”.
Fill in:
- App ID — from Step 1
- App Secret — from Step 1
Leave the Feishu User ID field empty for now.
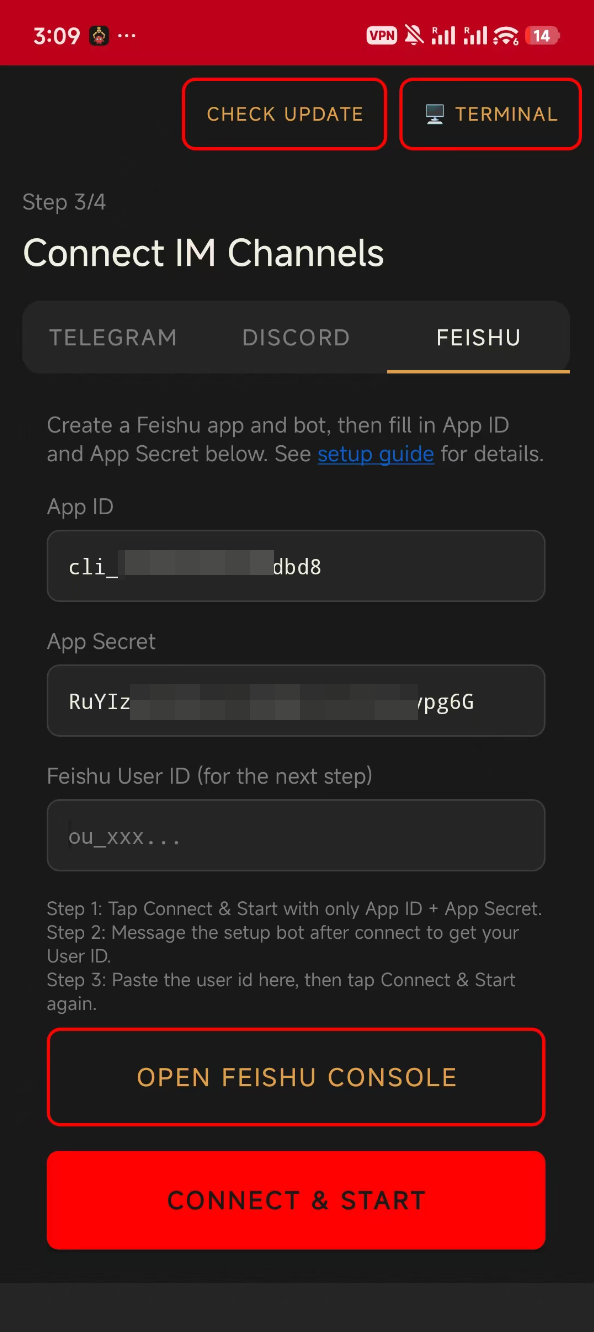
Tap CONNECT & START.
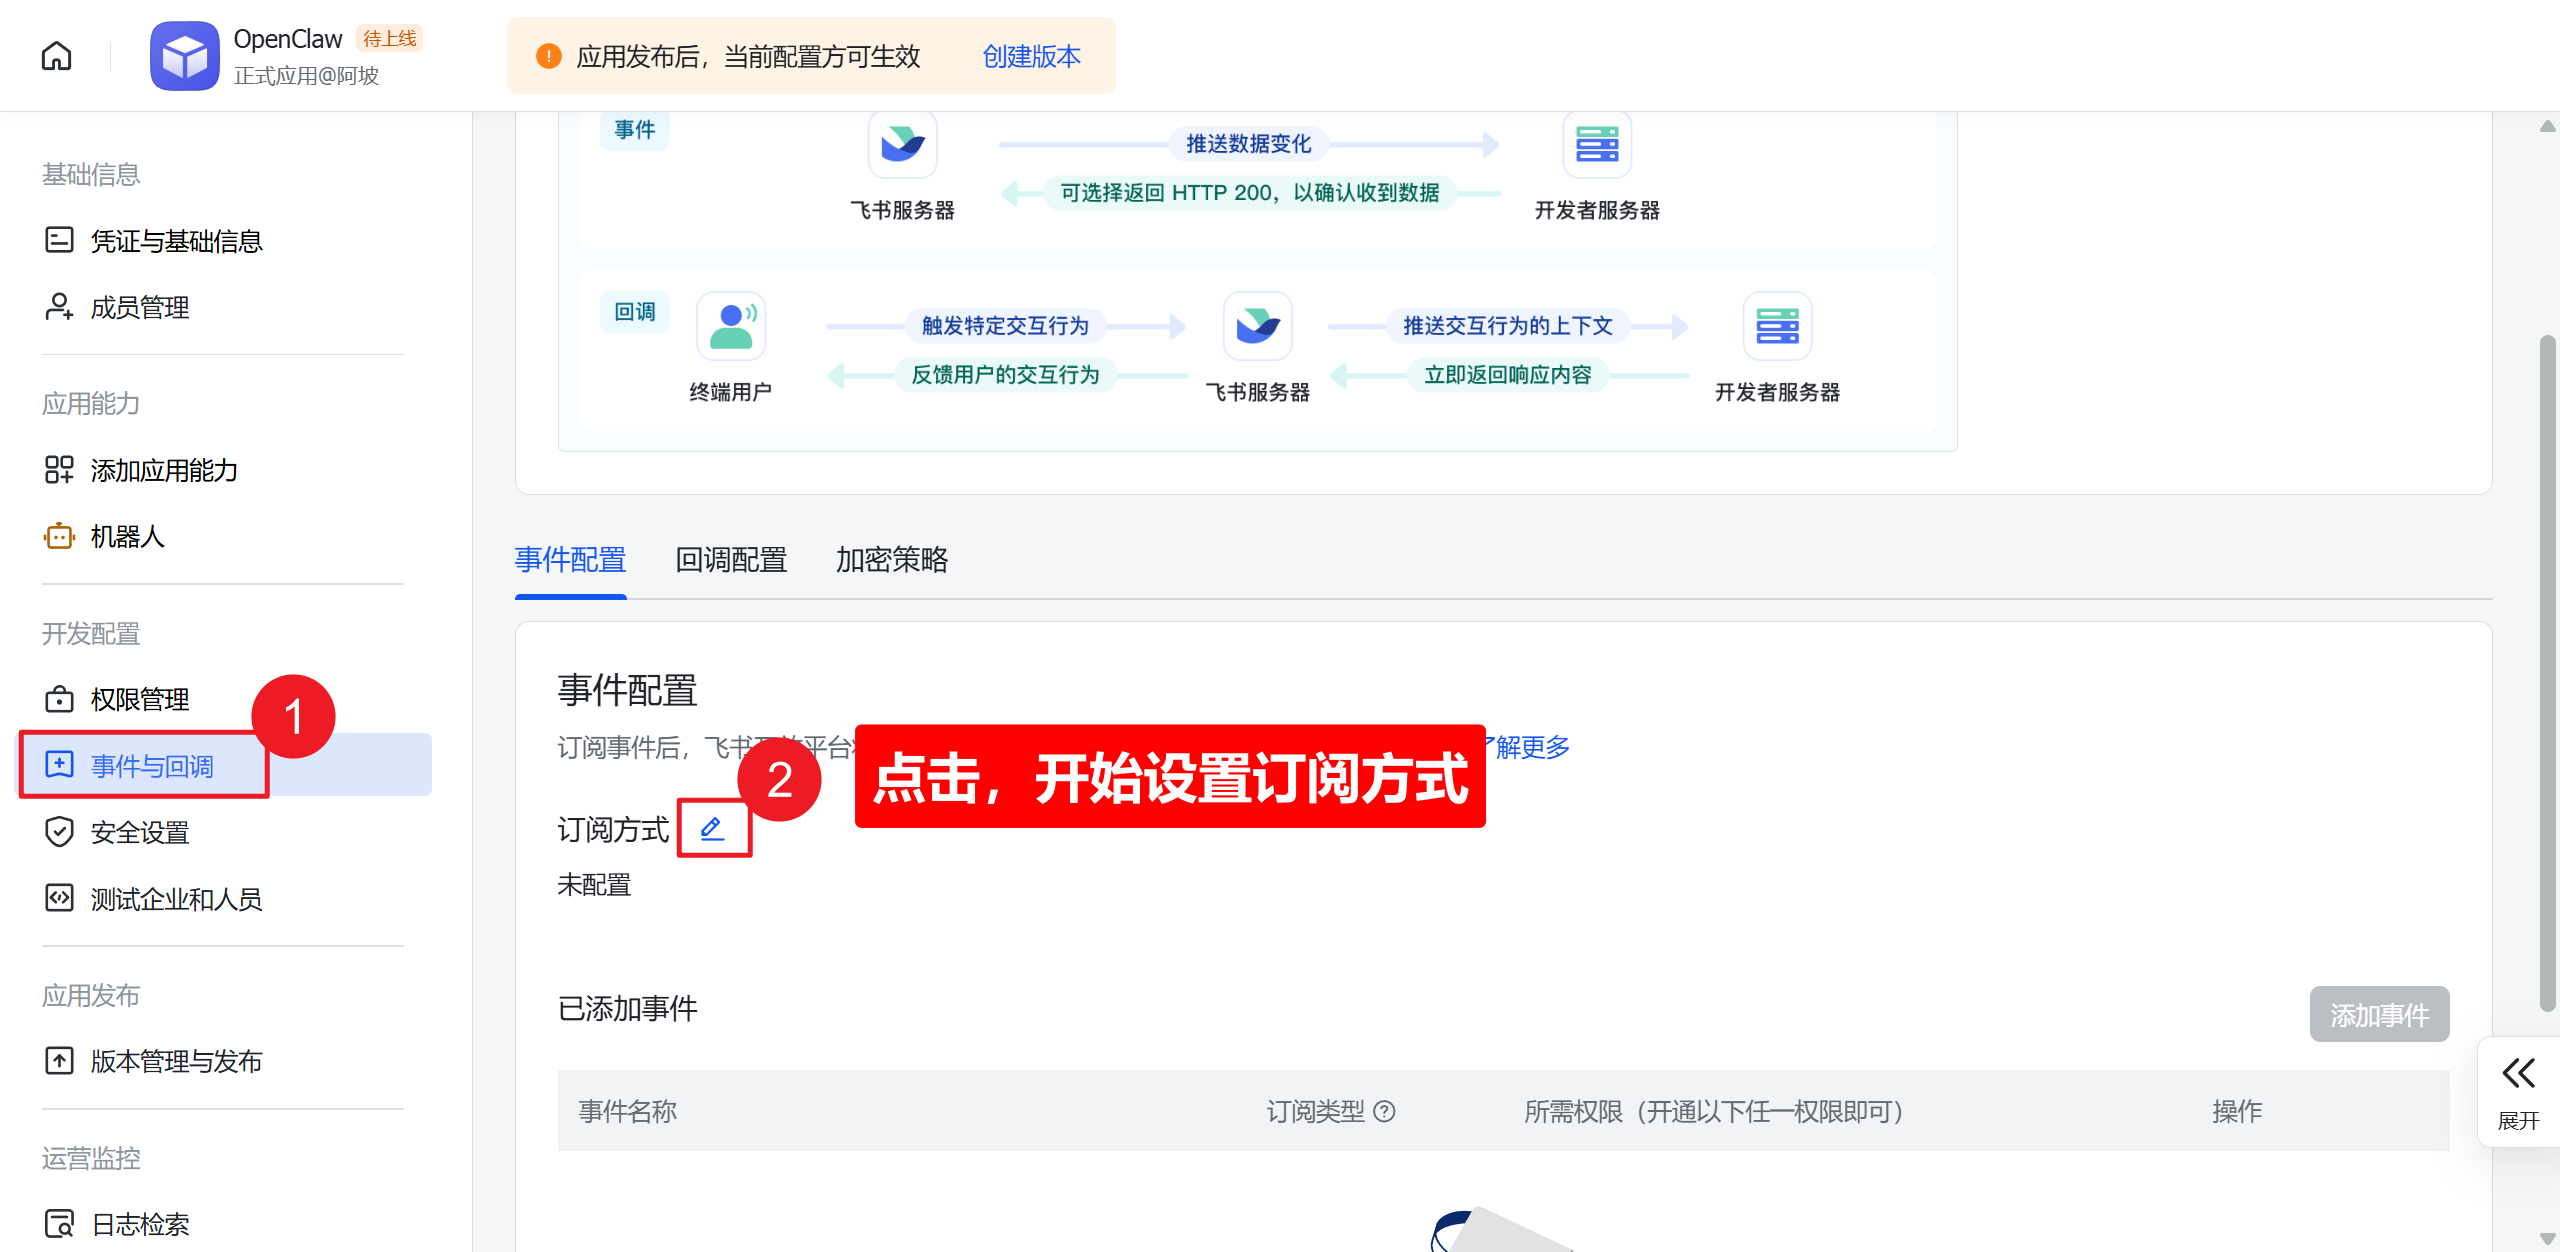
Step 3: Set Up Event Subscription
Section titled “Step 3: Set Up Event Subscription”Go back to your app settings on the Feishu Open Platform.
Configure Event Subscription
Section titled “Configure Event Subscription”Go to “Events & Callbacks” and click edit.
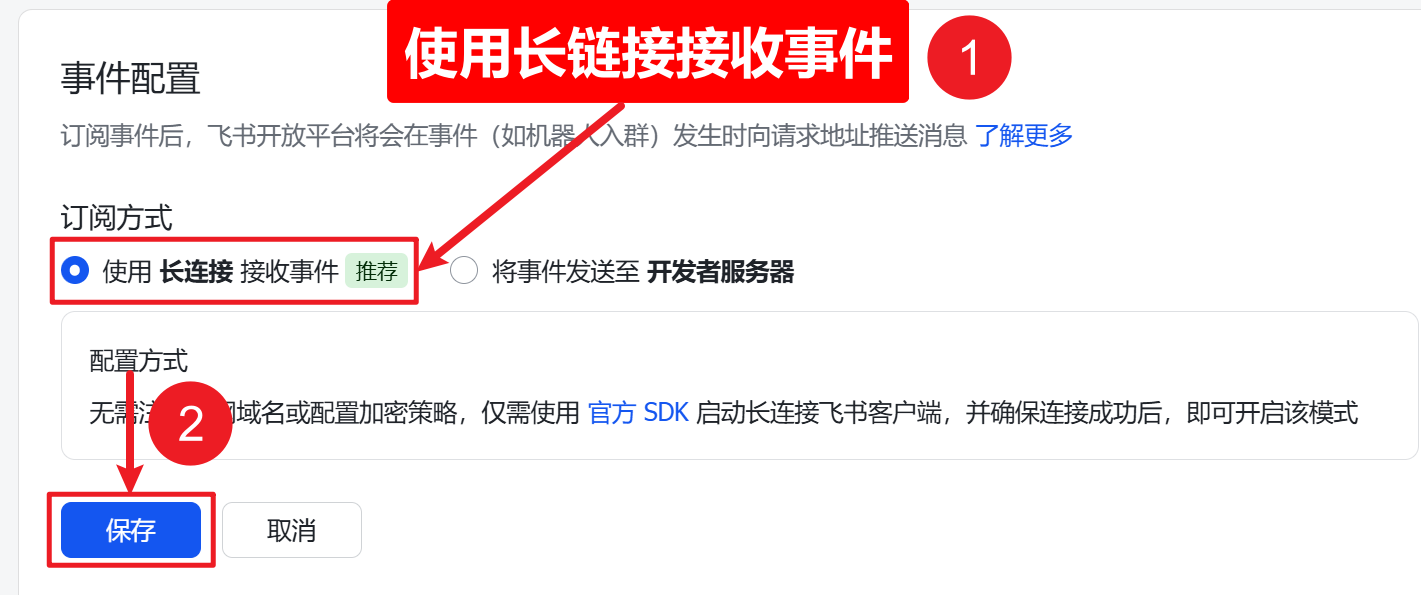
Select “Use Long Connection to Receive Events” and save.
Add Message Receive Event
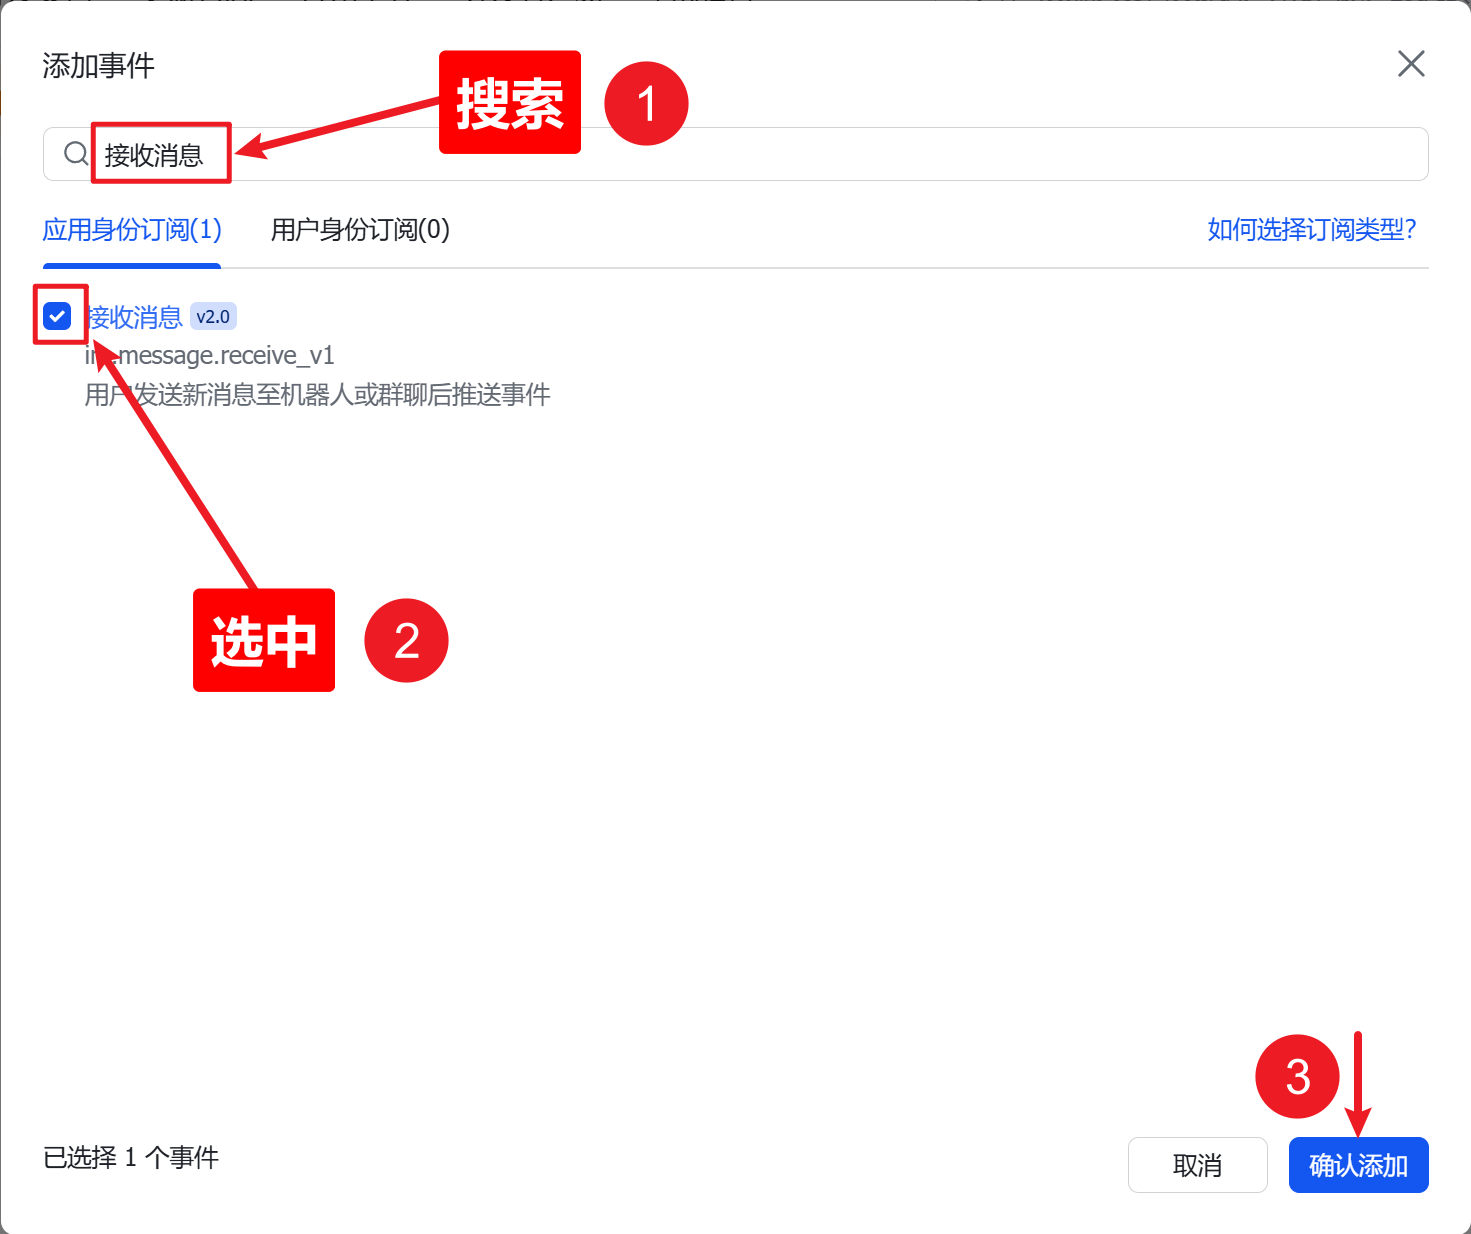
Section titled “Add Message Receive Event”After saving, the “Add Event” button becomes clickable.

Search for “Receive Message”, check im.message.receive_v1, and confirm.
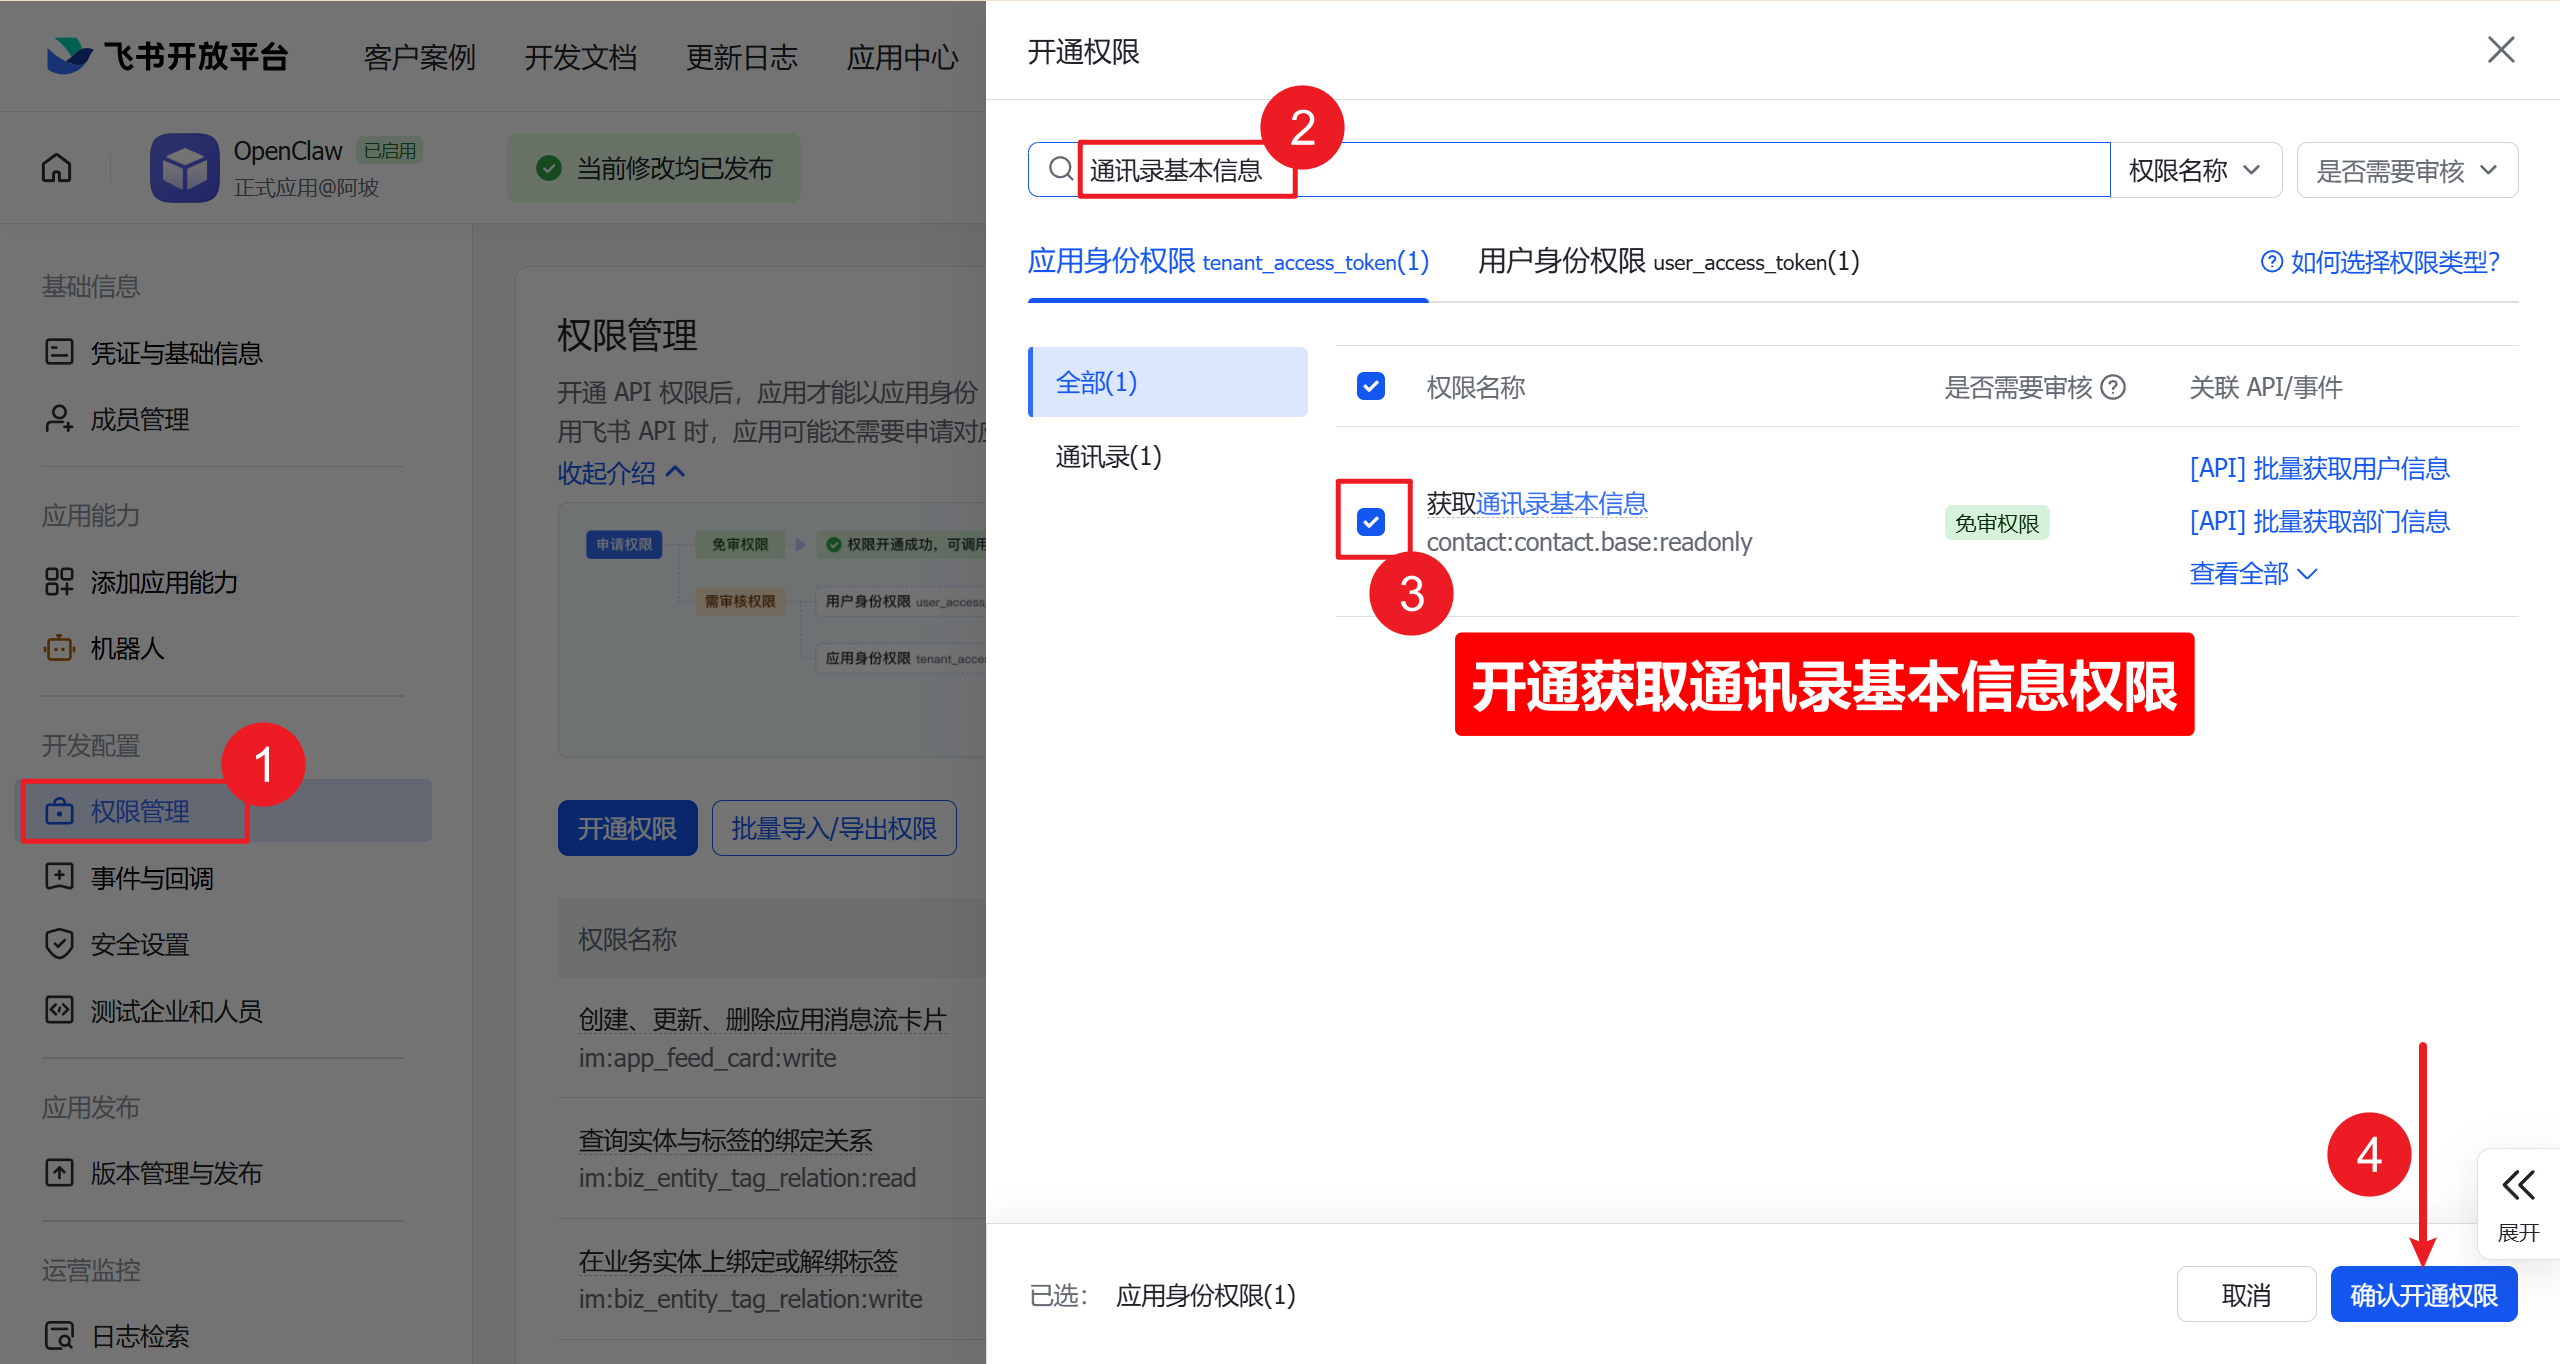
Add Contact Permission
Section titled “Add Contact Permission”The system will prompt for contact info permission. Search for contact:contact.base:readonly and enable it.
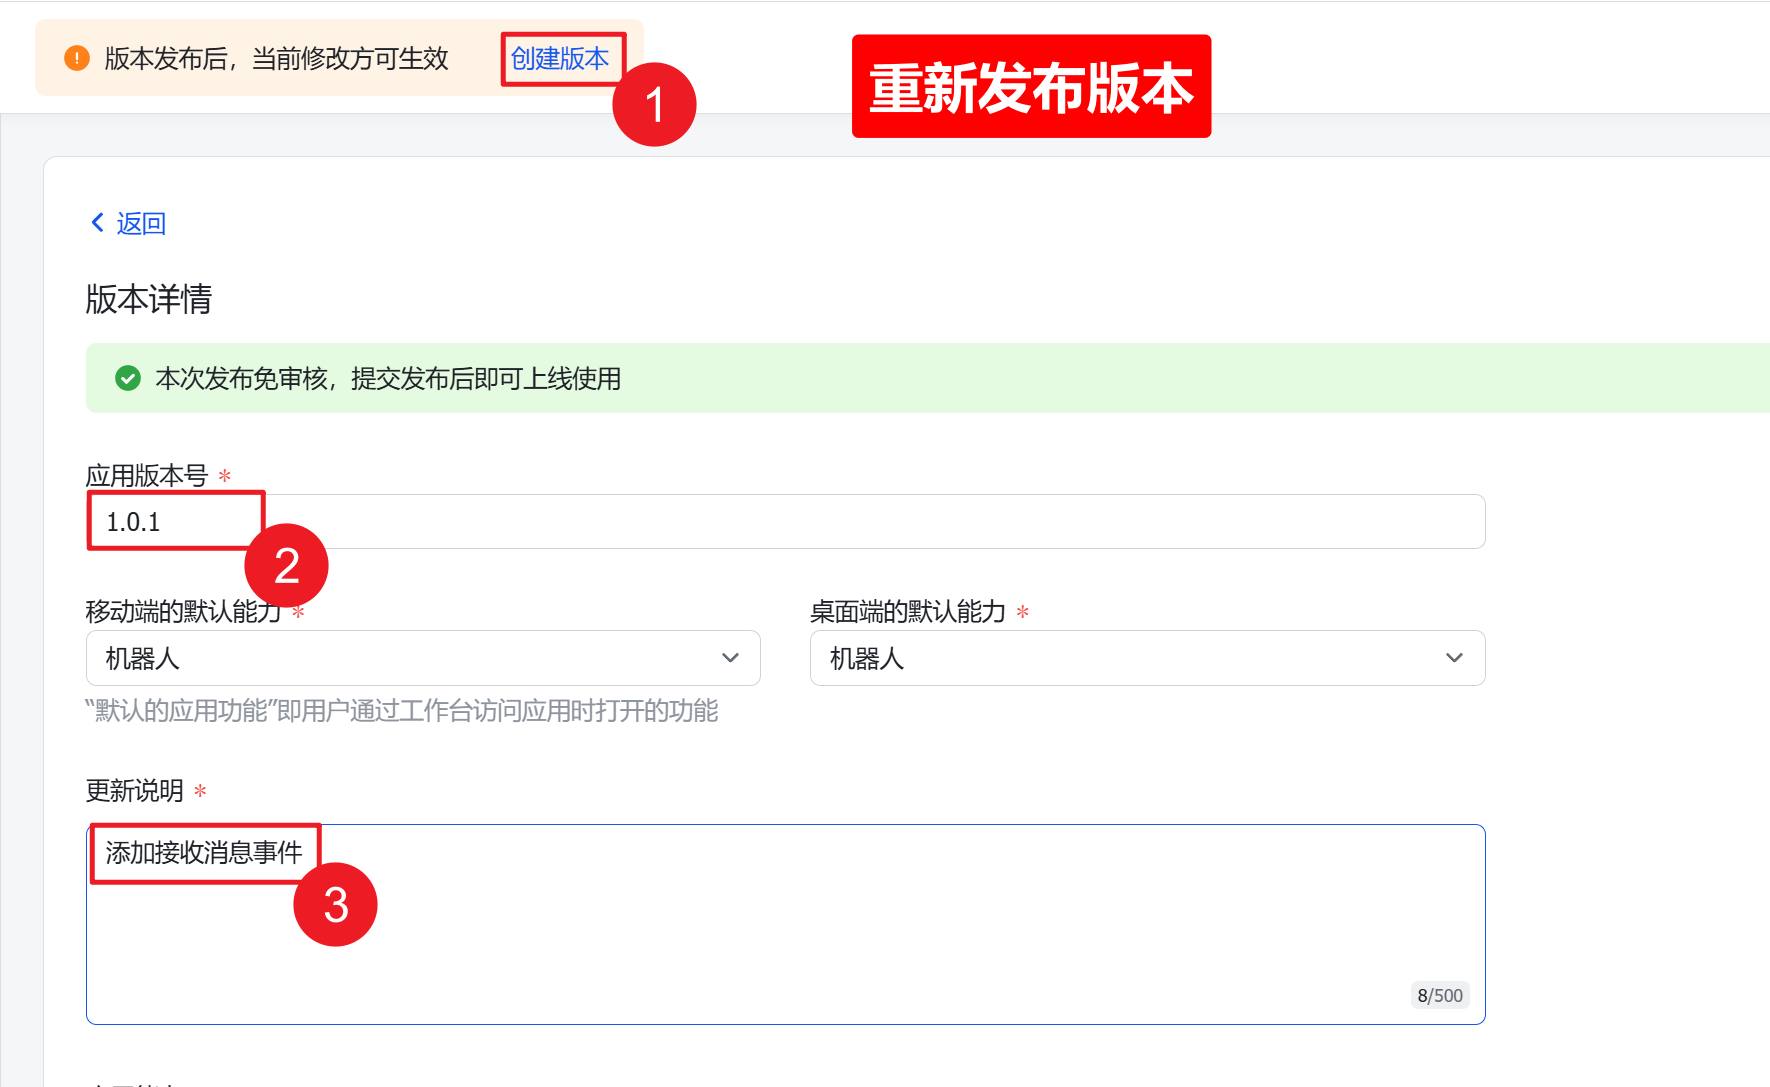
Republish
Section titled “Republish”Create a new version (e.g. 1.0.1) and publish again.
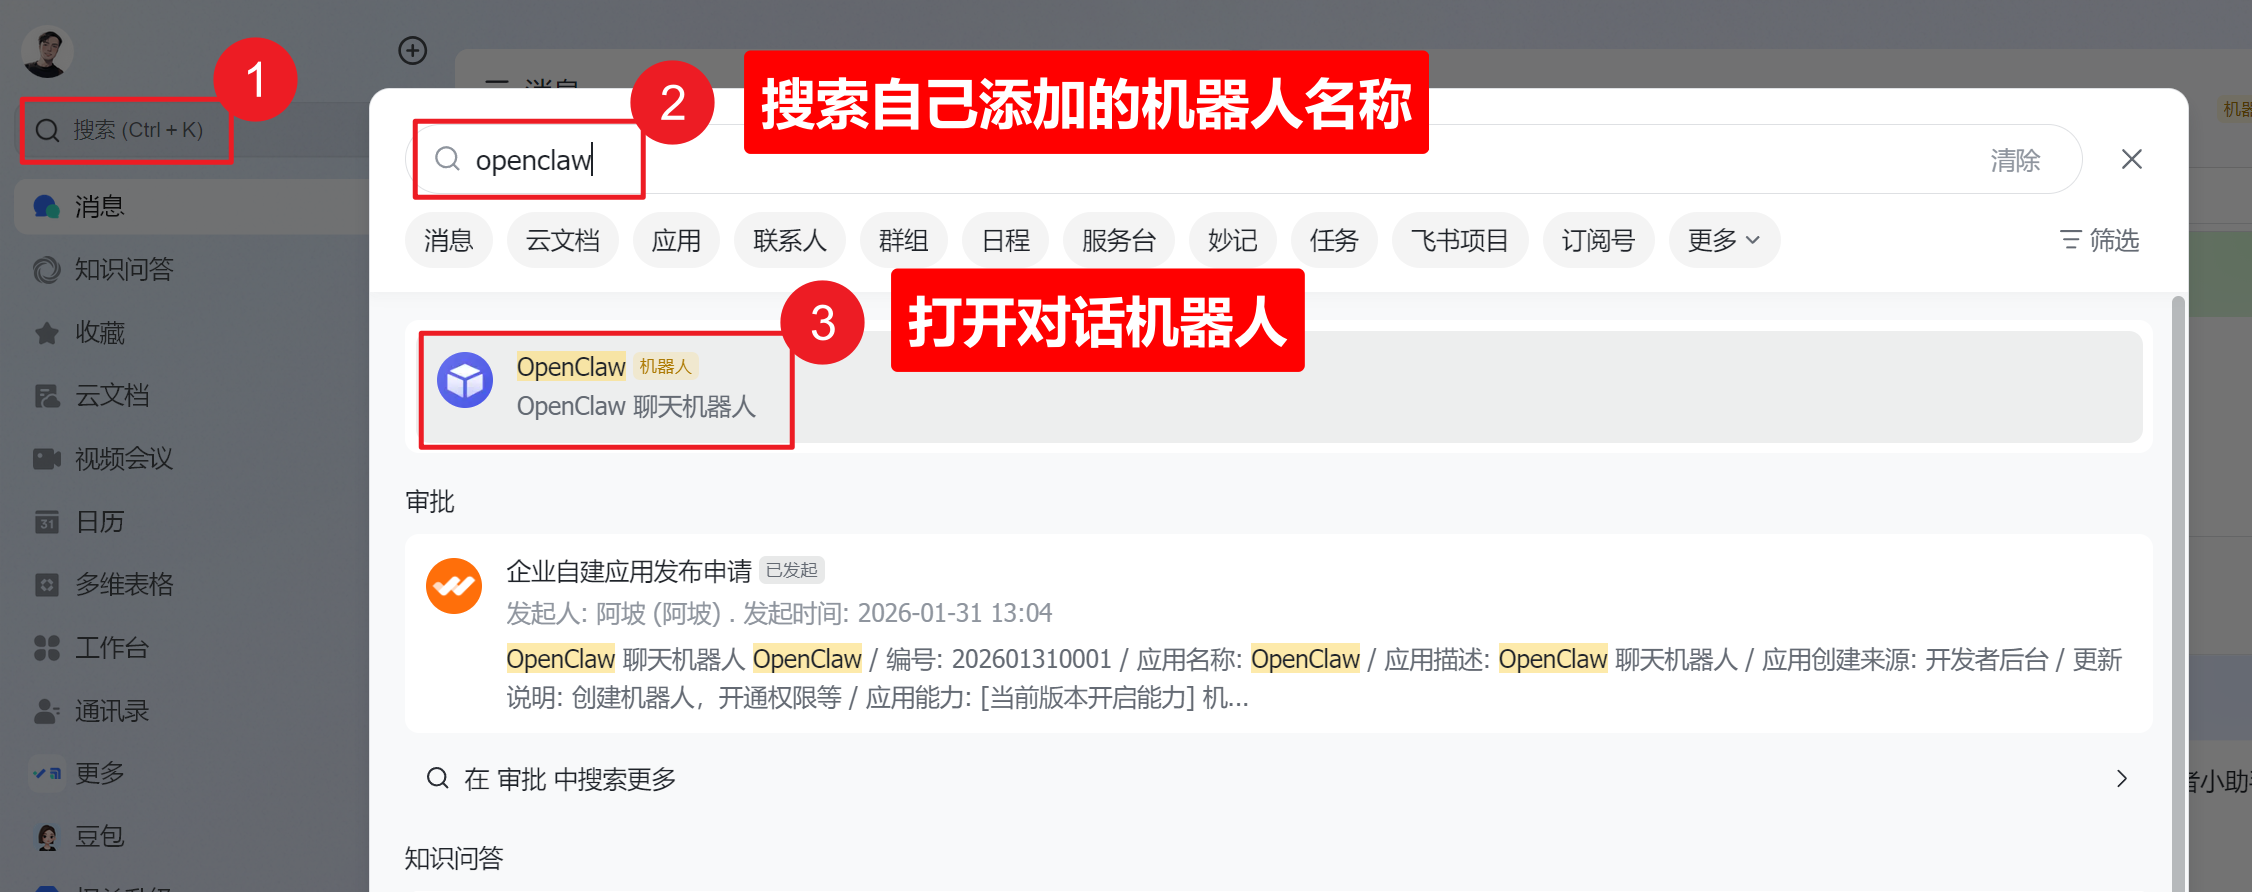
Step 4: Get Your User ID
Section titled “Step 4: Get Your User ID”Search for your bot name in Feishu and send it a message. The bot will reply with your Feishu User ID.
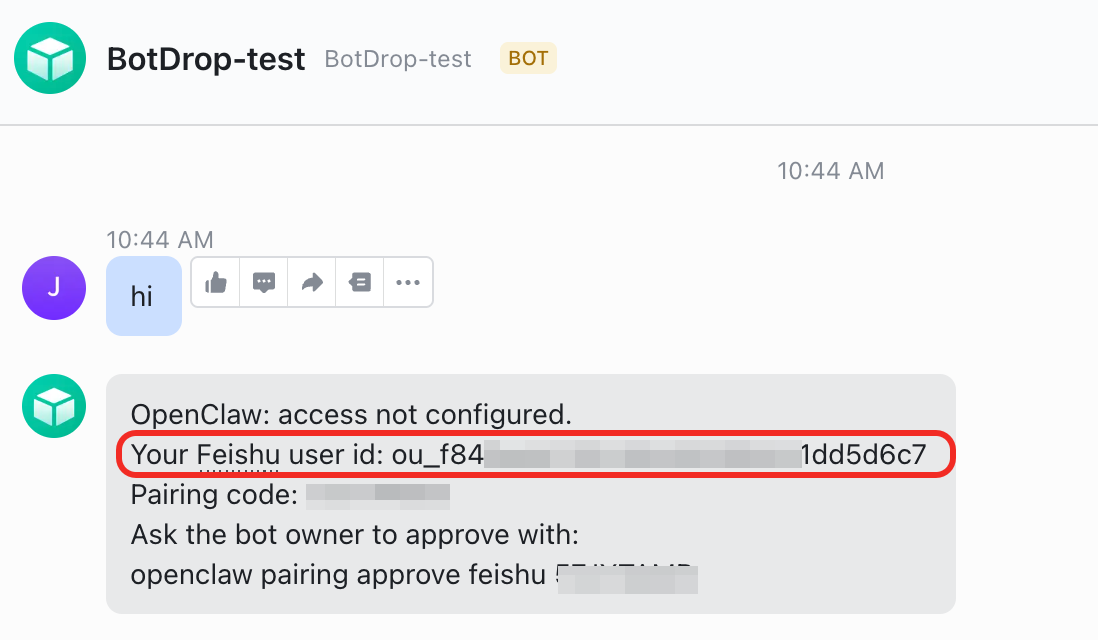
Copy the User ID, go back to BotDrop, and paste it into the Feishu User ID field.
Tap CONNECT & START again. Done.
Troubleshooting
Section titled “Troubleshooting”| Problem | Solution |
|---|---|
| Bot doesn’t reply | Check that event subscription uses long connection and im.message.receive_v1 event is added. |
| Permission denied | Make sure all IM permissions are enabled and a new version is published after changes. |
| Can’t find the bot | Search by the exact bot name you set when creating the app. |